Azure Arc Onboarding Wrap Up
In the last post, we ran through who to onboard servers from on-premises into Azure using onboarding scripts. This is one of many ways to complete this task and if you missed the blog post in the series, here is a link Azure Arc - Onboarding to Azure Arc. The purpose of this post is to wrap up a few items from the previous post and set the scene for future posts.
Tags
The eagle-eyed of you will have noticed I set several tags at the resource group level and then several via the onboarding script. For those who didn’t notice, no need to worry as this was intentional and we will be covering why this is the case.
Briefly, Tags are information stored in terms of a key-value pair. In other words, one part of the pair defines the tag and the other part contains information which combined makes some form of the meaning of the definition, its metadata essentially. Tags are not mandatory to use throughout the Azure platform, so Why should I use them? I think this line of questioning is completely plausible and using my background in on-premise infrastructure I can think of these follow-up questions to support the question of Why should I?
- This functionality isn’t necessarily readily available on-premise, so why does it matter?
- Isn’t that what maintaining documentation is for?
- Will anyone read/review them?
- Do they get used somehow?
First of all, why wouldn’t you? There is no cost element to implementing tags however, what I would add is that they should be relevant and help you achieve a particular purpose. Whether this is to assist in billing reporting purposes, collect useful information, who build the resource, when it was built or even to be used in automation 😉
Secondly, in larger environments, with multiple teams that could even be distributed across multiple regions, it can assist in determining a VM function and owner. Providing more of a self-service experience allowing teams to become more agile, have you ever been subject to finding that one document you were looking at last week but cannot find today? If not, you’re lucky!
Finally, imagine being able to create views or workbooks with information based on tags stored against a VM. There is certainly a lot of flexibility in using them and with the additional reasons above you can see quickly how they become useful.
Ben, why is this important you ask? In the previous post, I set the following Tags:
-
Resource Group
- city
- costcode
- datacentre
-
Onboarding Script
- Environment
- Hypervisor
- Type
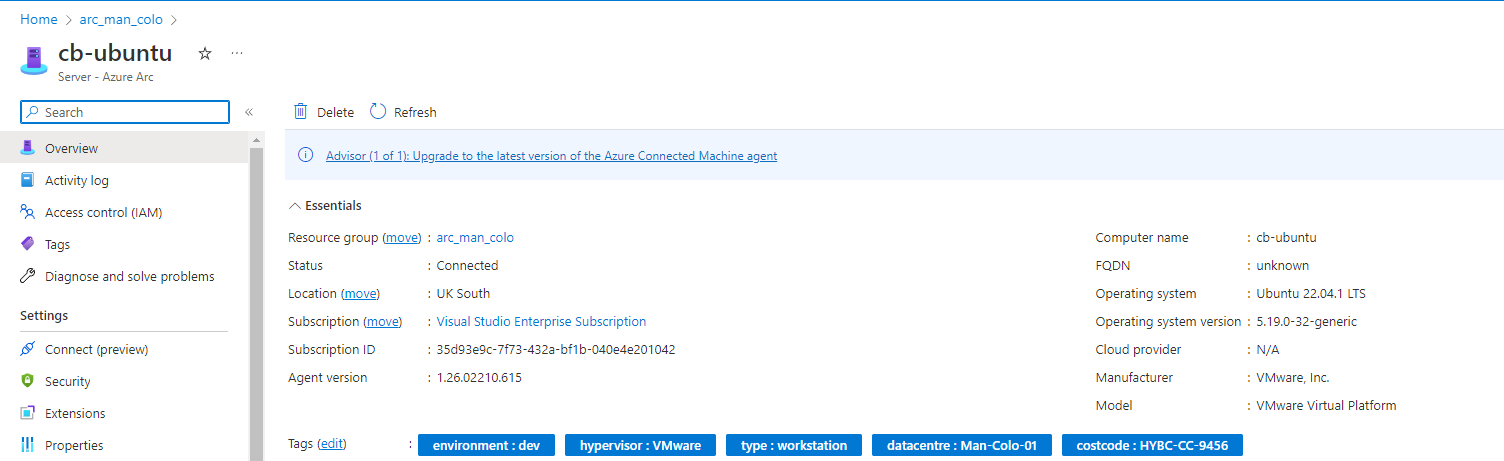
As you can see collectively those tags would cover quite a bit of information that we could use to quickly and effectively display information about servers contained within the resource group or if you were viewing all the Arc-enabled servers from a single pane.
Dont forget that the resource group is set in the onboarding script so when the onboarding script is run, the servers will end up in the resource group specified.
So to complete this section on Tags, let’s inherit the tags set at the resource group level onto the Arc-enabled servers. Jump into the portal, first, we need to obtain the resource group ID of ‘arc_man_colo’ where the Arc-enabled servers end up.
If you have multiple subscriptions, make sure you set the correct subscription using: az account set –subscription
<name or id >
Once we have the ID of the resource group, the next step we’re going to use some of the prebuilt policies to enforce tag inheritance from the resource group and add a non-compliance message. To create the policy we will use Azure CLI to complete these next steps.
az policy assignment create --name "inherit_tag_city" --display-name "Inherit city tag from the resource group" --scope $rgId --policy cd3aa116-8754-49c9-a813-ad46512ece54 --mi-system-assigned --location uksouth --params '{"tagName": {"value": "city"}}'
To create the non-compliance message use the following command:
az policy assignment non-compliance-message create --name inherit_tag_city --resource-group arc_man_colo --message "Resource has not inherited the city tag"
Repeat for the costcode and datacentre tags.
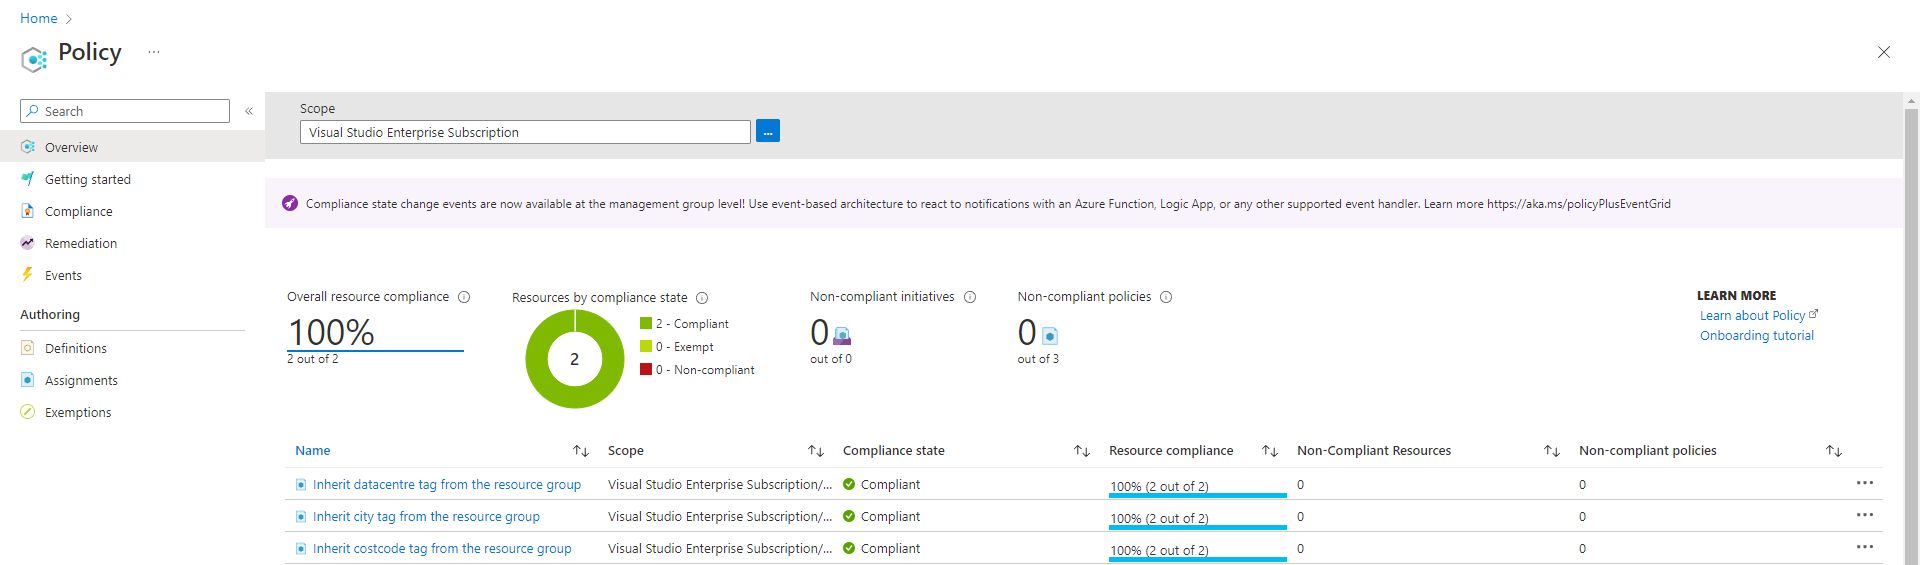
With the policies, we can check for non-compliance (which at this point our resources will be non-compliant) which we can resolve with a remediation task.
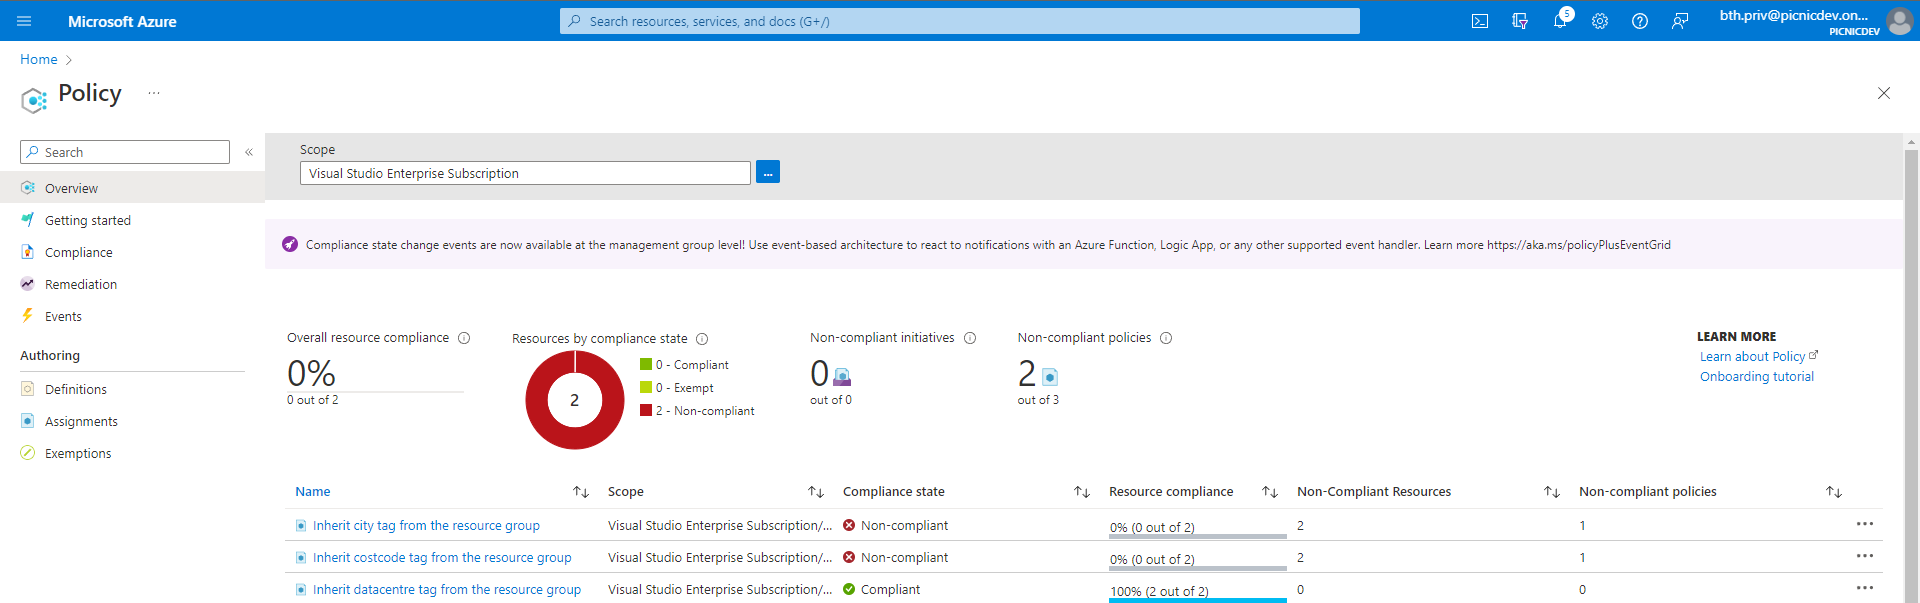
You may need to ensure the managed identity has the appropriate permissions if the remediation task fails. To add these permissions, go to the Edit Assignment page for the Policy in question and re-save it.
You can see from the overview page above that remediation tasks need to be run to ensure we bring the Arc-enabled endpoints into compliance with our defined policies. Let’s remediate the resources, two out of the three policies for tag inheritance have been remediated already.
The policy left to complete is the Inherit city tag from resource group, select this from the overview page.
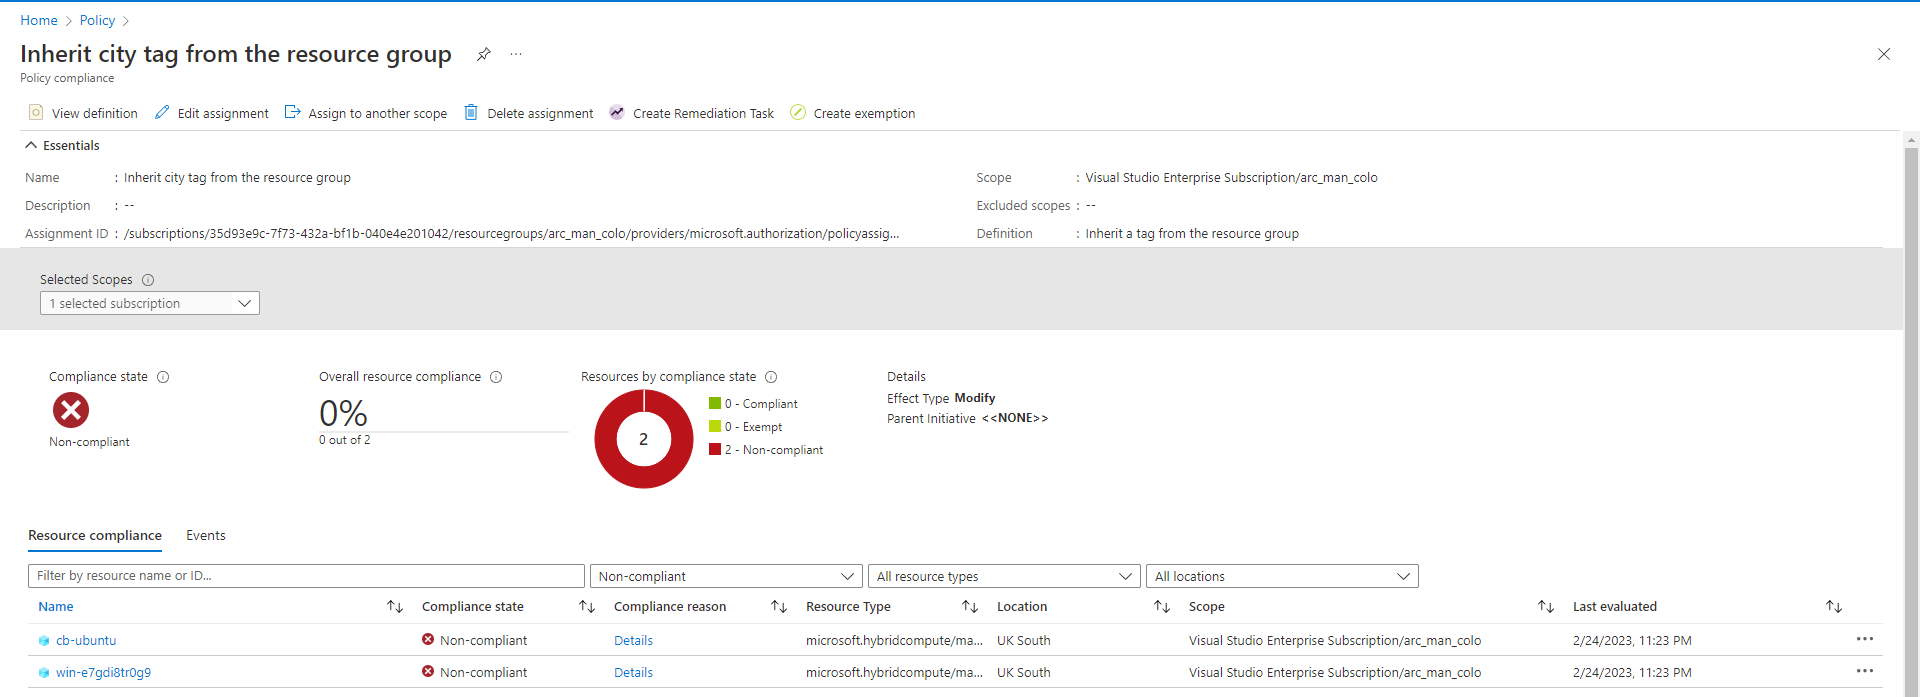
Select Create Remediation Task
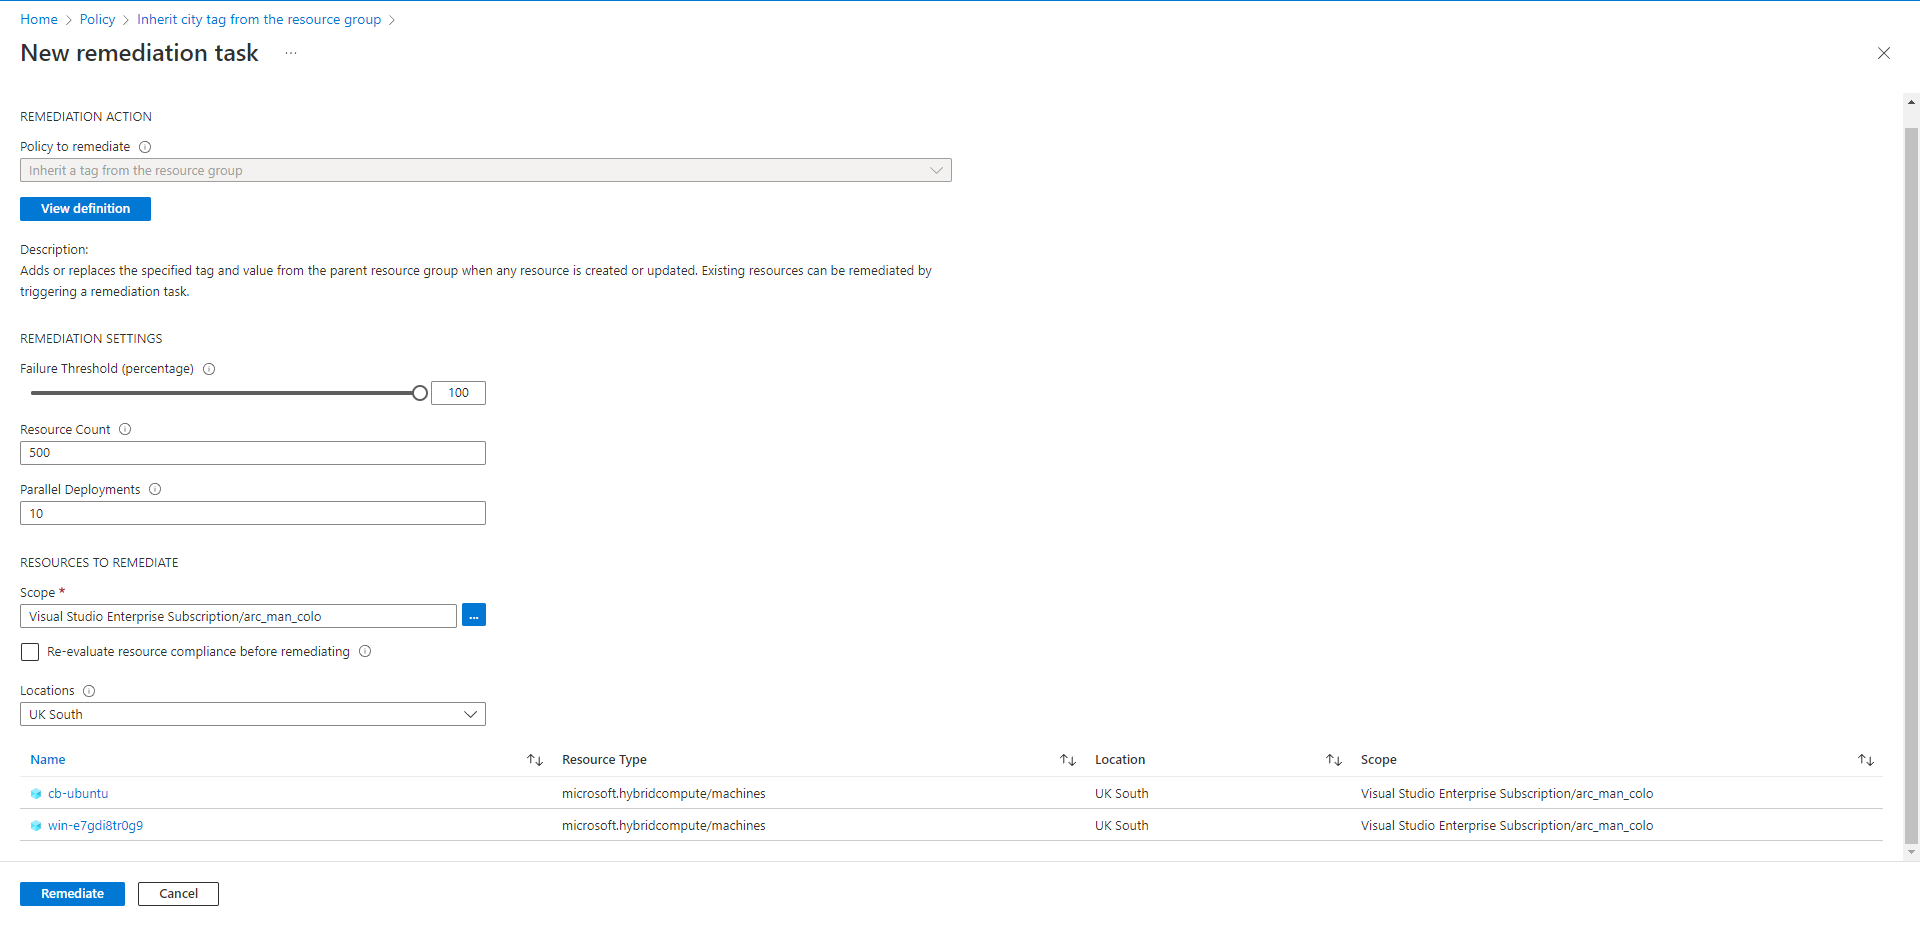
Confirm the settings meet your requirements including the resource you need/want to remediate, then select the Remediate button at the bottom. This task will then complete the required actions to ensure that the city tag is applied to the resources required. It will take some time but once complete you should see that resources assigned against the city policy are now compliant.
RBAC
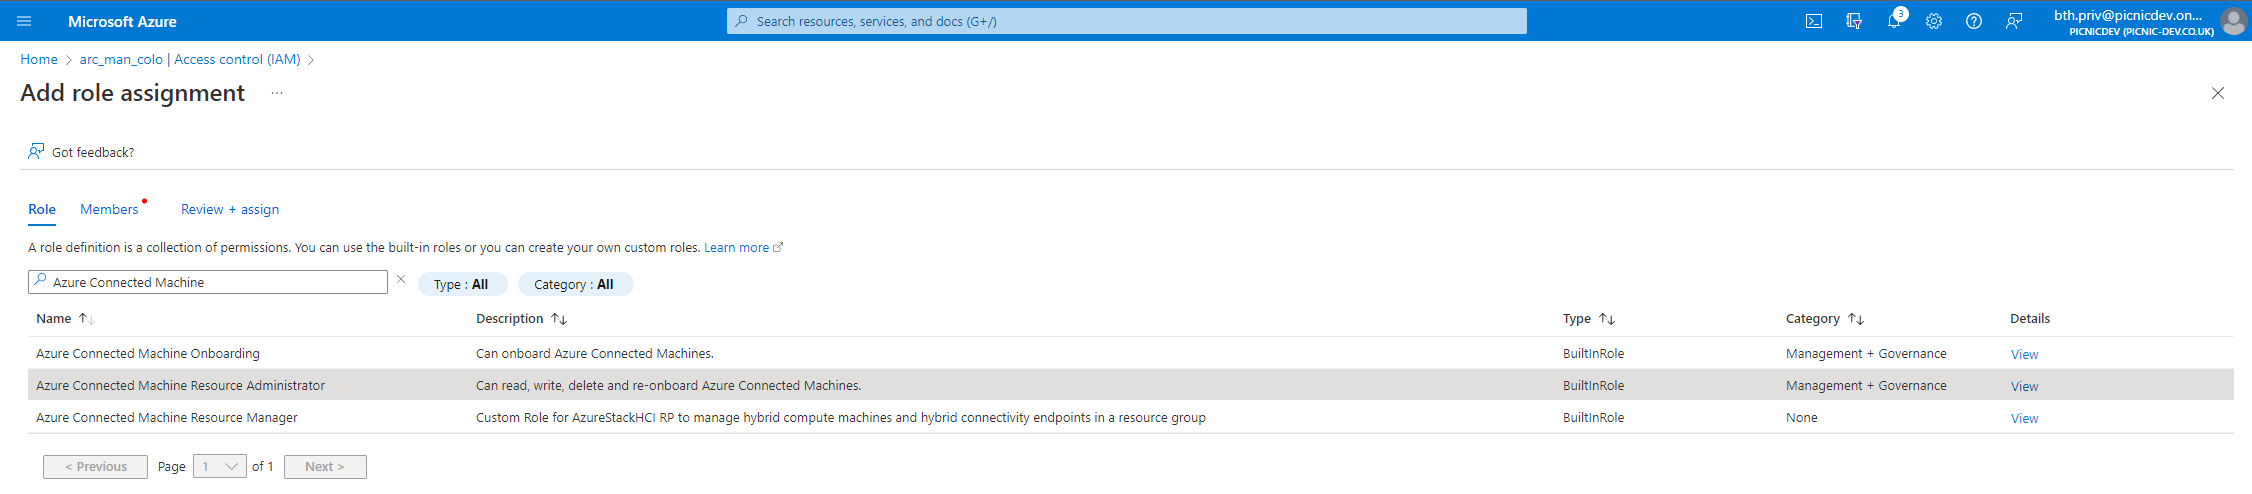
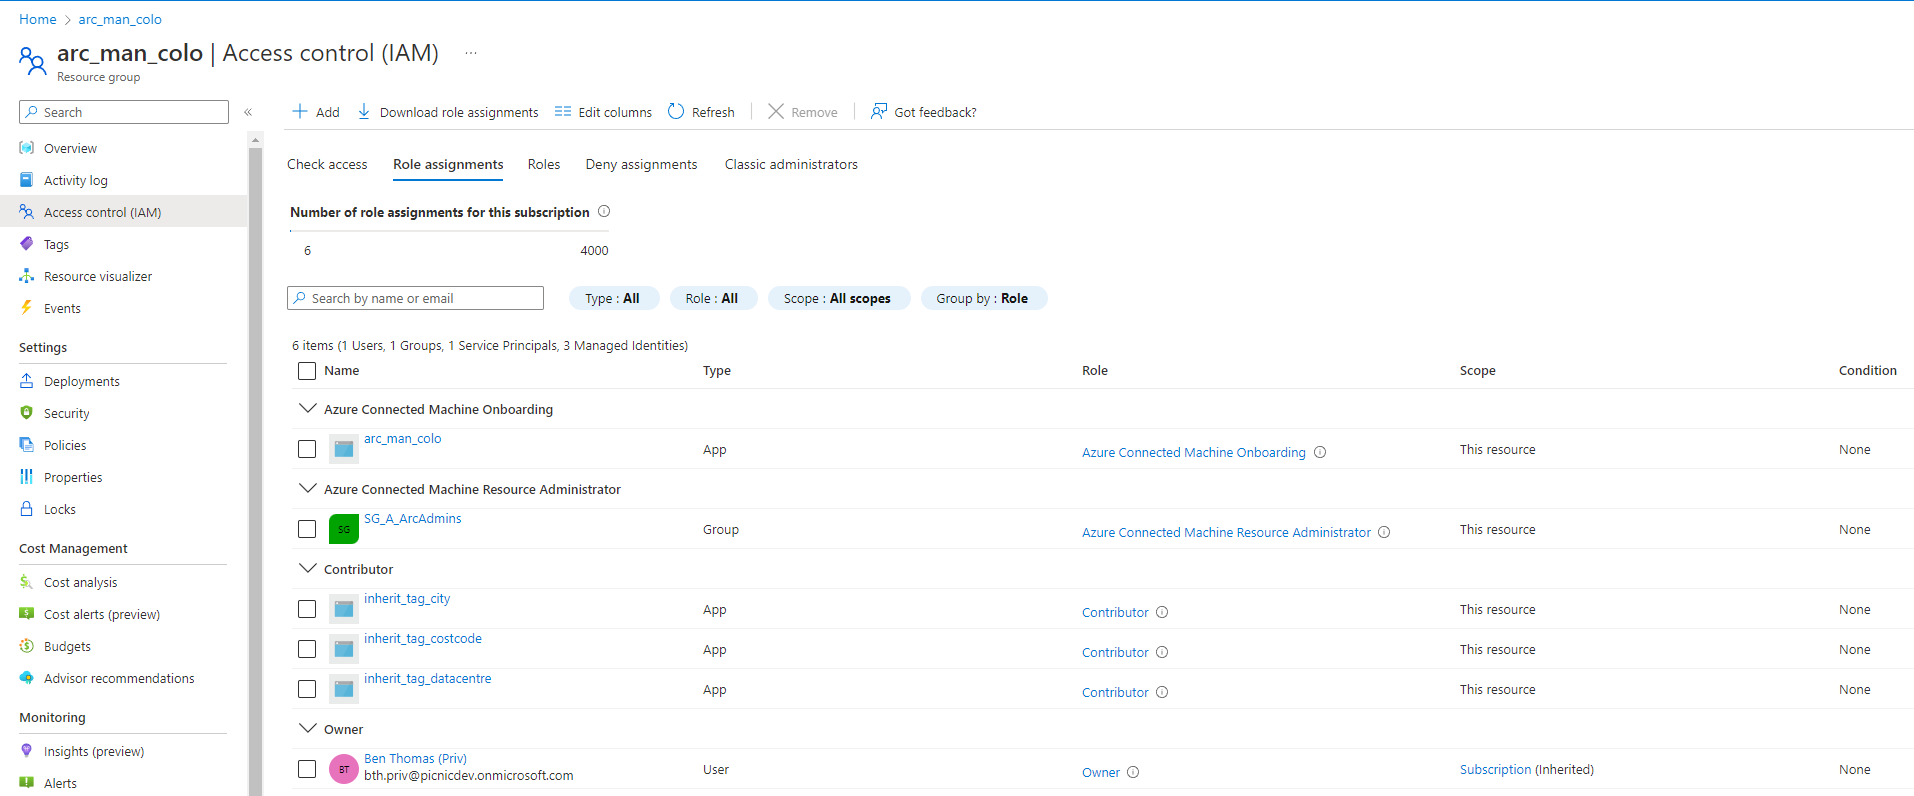
Identity and permissions are crucial and integral, being able to complete a task with the least amount of privilege should always be considered. There are an exhaustive amount of built-in RBAC roles and these should always be considered first to ensure ease of maintenance going forward. RBAC can be applied to different levels of scope from the Management Group down to Resources. The RBAC role Azure Connected Machine Resource Administrator is one which we will be used to control access to our Arc-enabled endpoints (The list of permissions this role has can be found here).
To make management easier, let’s create a security group (on-premise or cloud only) and assign the RBAC role at the resource group scope level.
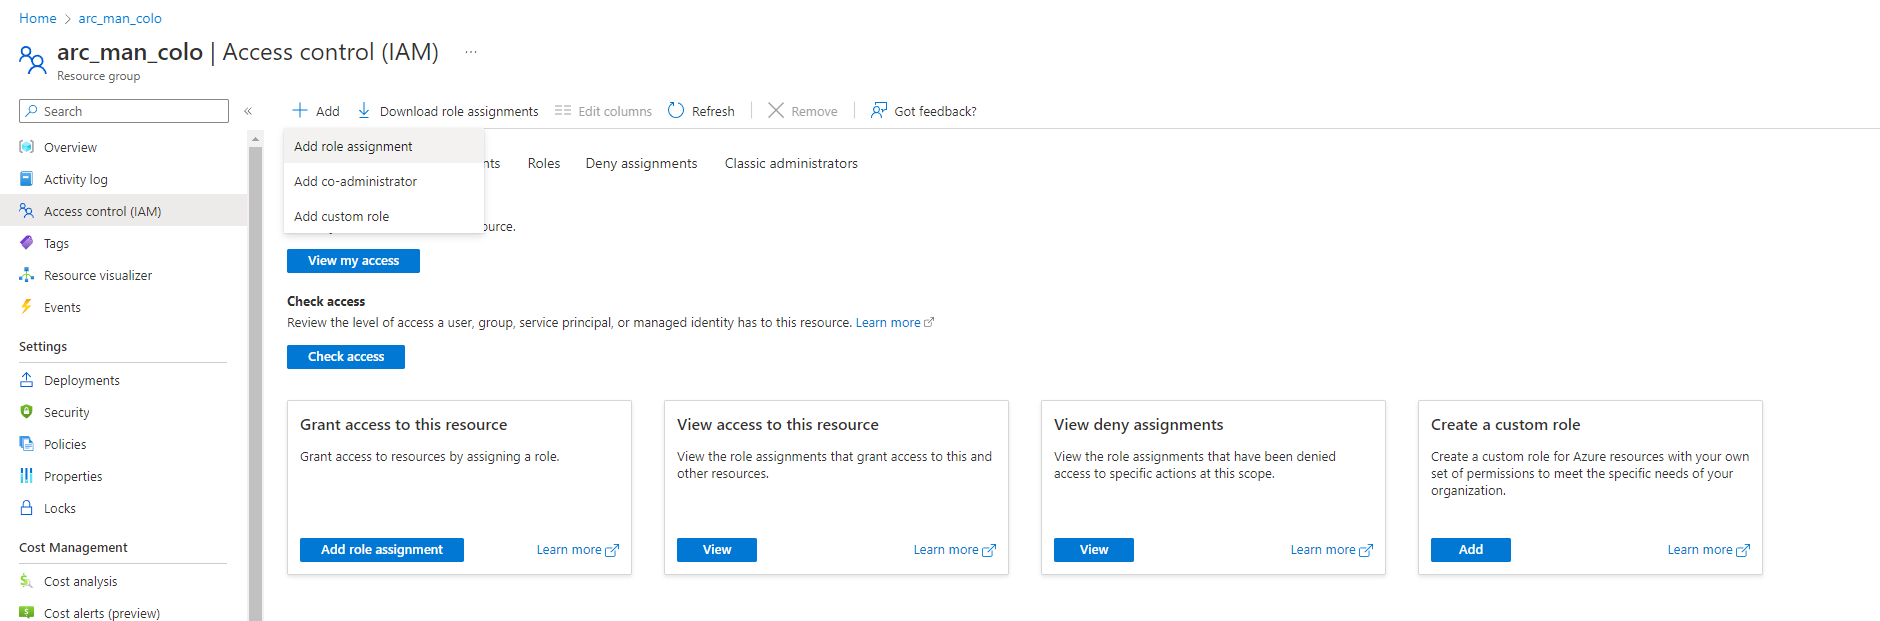
Search for the RBAC role you want to assign, as mentioned above we will use the Azure Connected Machine Resource Administrator. Before this maybe search for ‘Arc’ and see how many roles are available around Arc workloads on Azure.
Confirm the role selection and move to the next page, use the User, group, or service principal option to select our desired security group, add a description if applicable and Review + assign the permissions once satisfied with your selections.
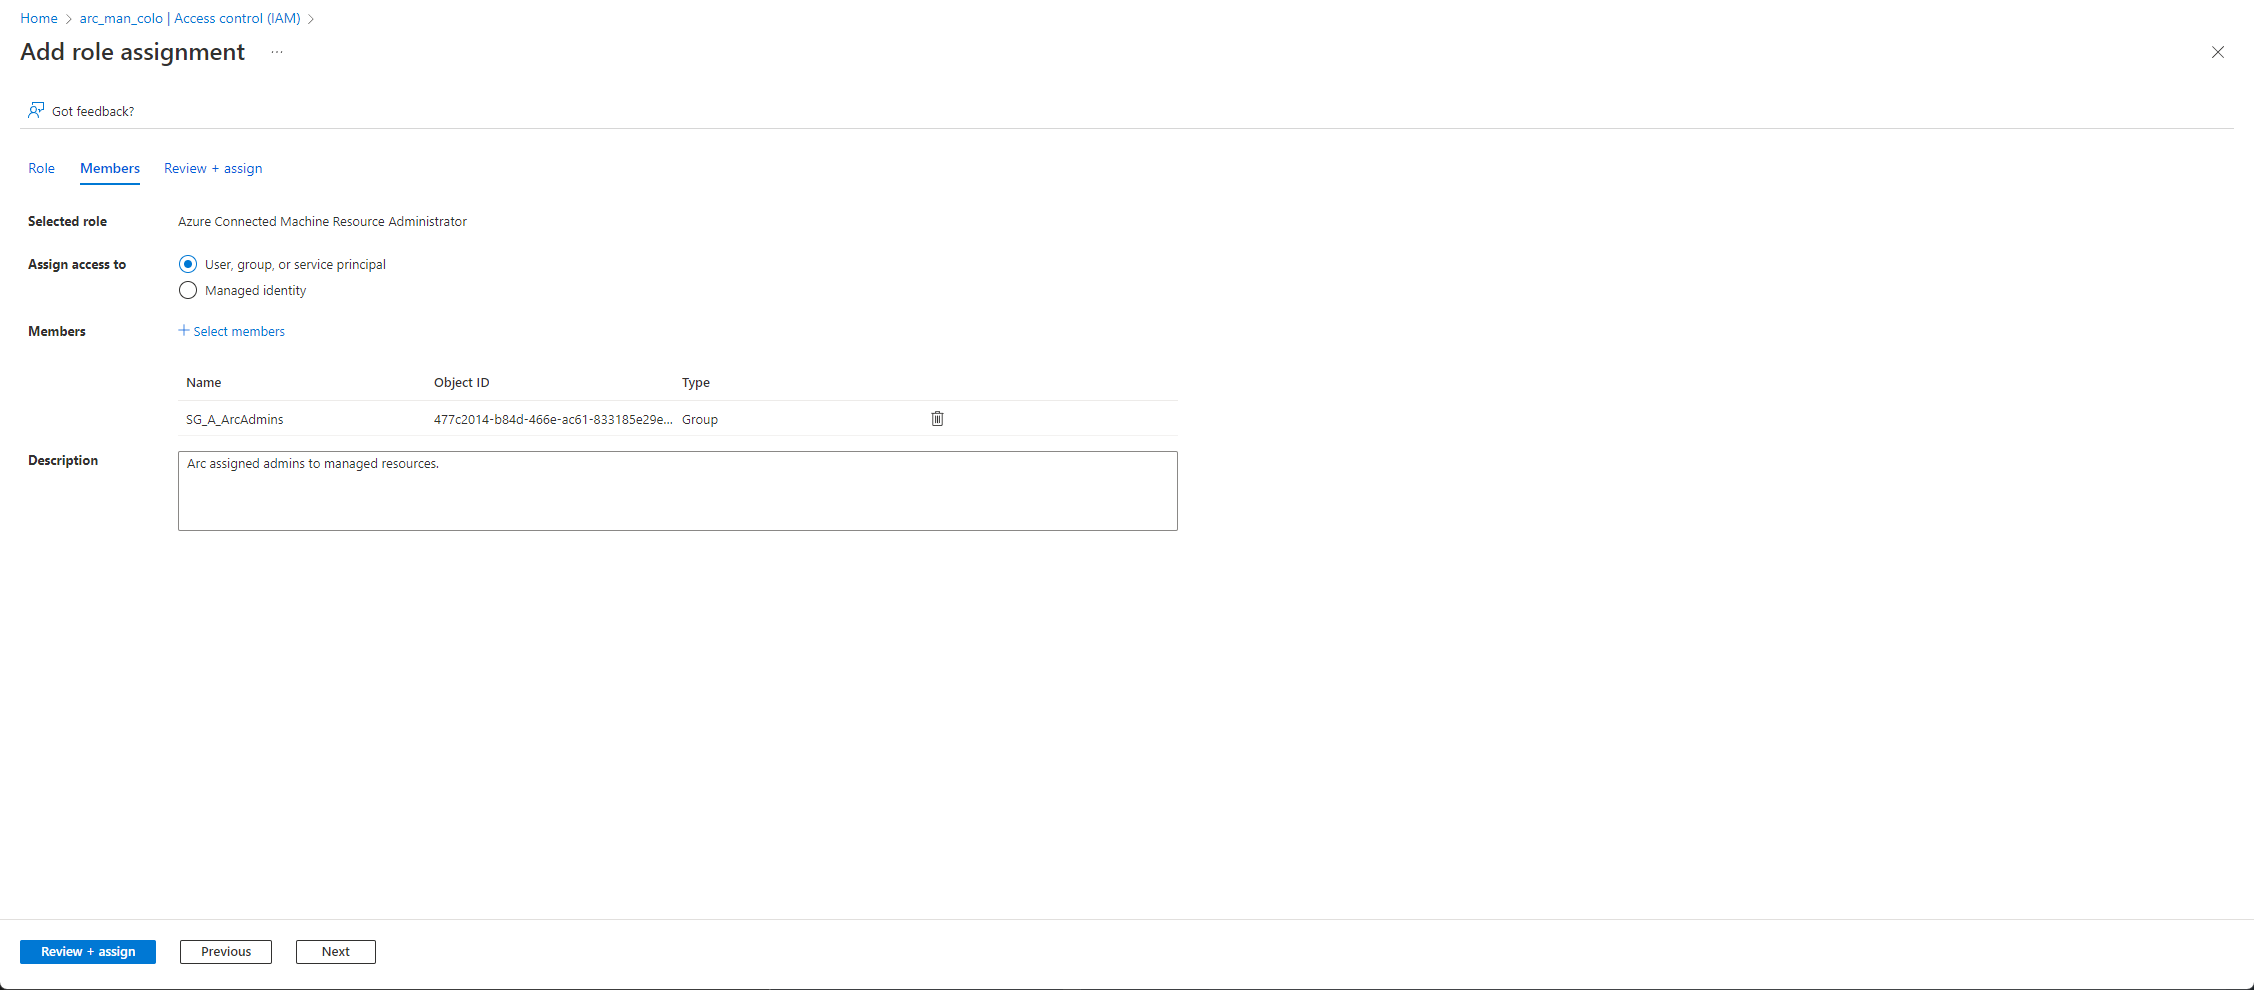
Once complete we can review to see all the permissions on the resource group and we will see our security group included.
Inventory
Once servers are onboarded they will appear collectively, you may want to filter these Arc-enabled servers quickly to ‘Windows vs Linux’, ‘costcode’, ‘hypervisor’ or event connection status. This can be achieved in several ways, views within the Arc-enabled server screen or Azure Resource Graph.
Views
Views can be used across the Azure portal, are easy to configure and have no additional costs. I will briefly show you how you can achieve different views to filter the servers that are returned. First, add all the required columns.
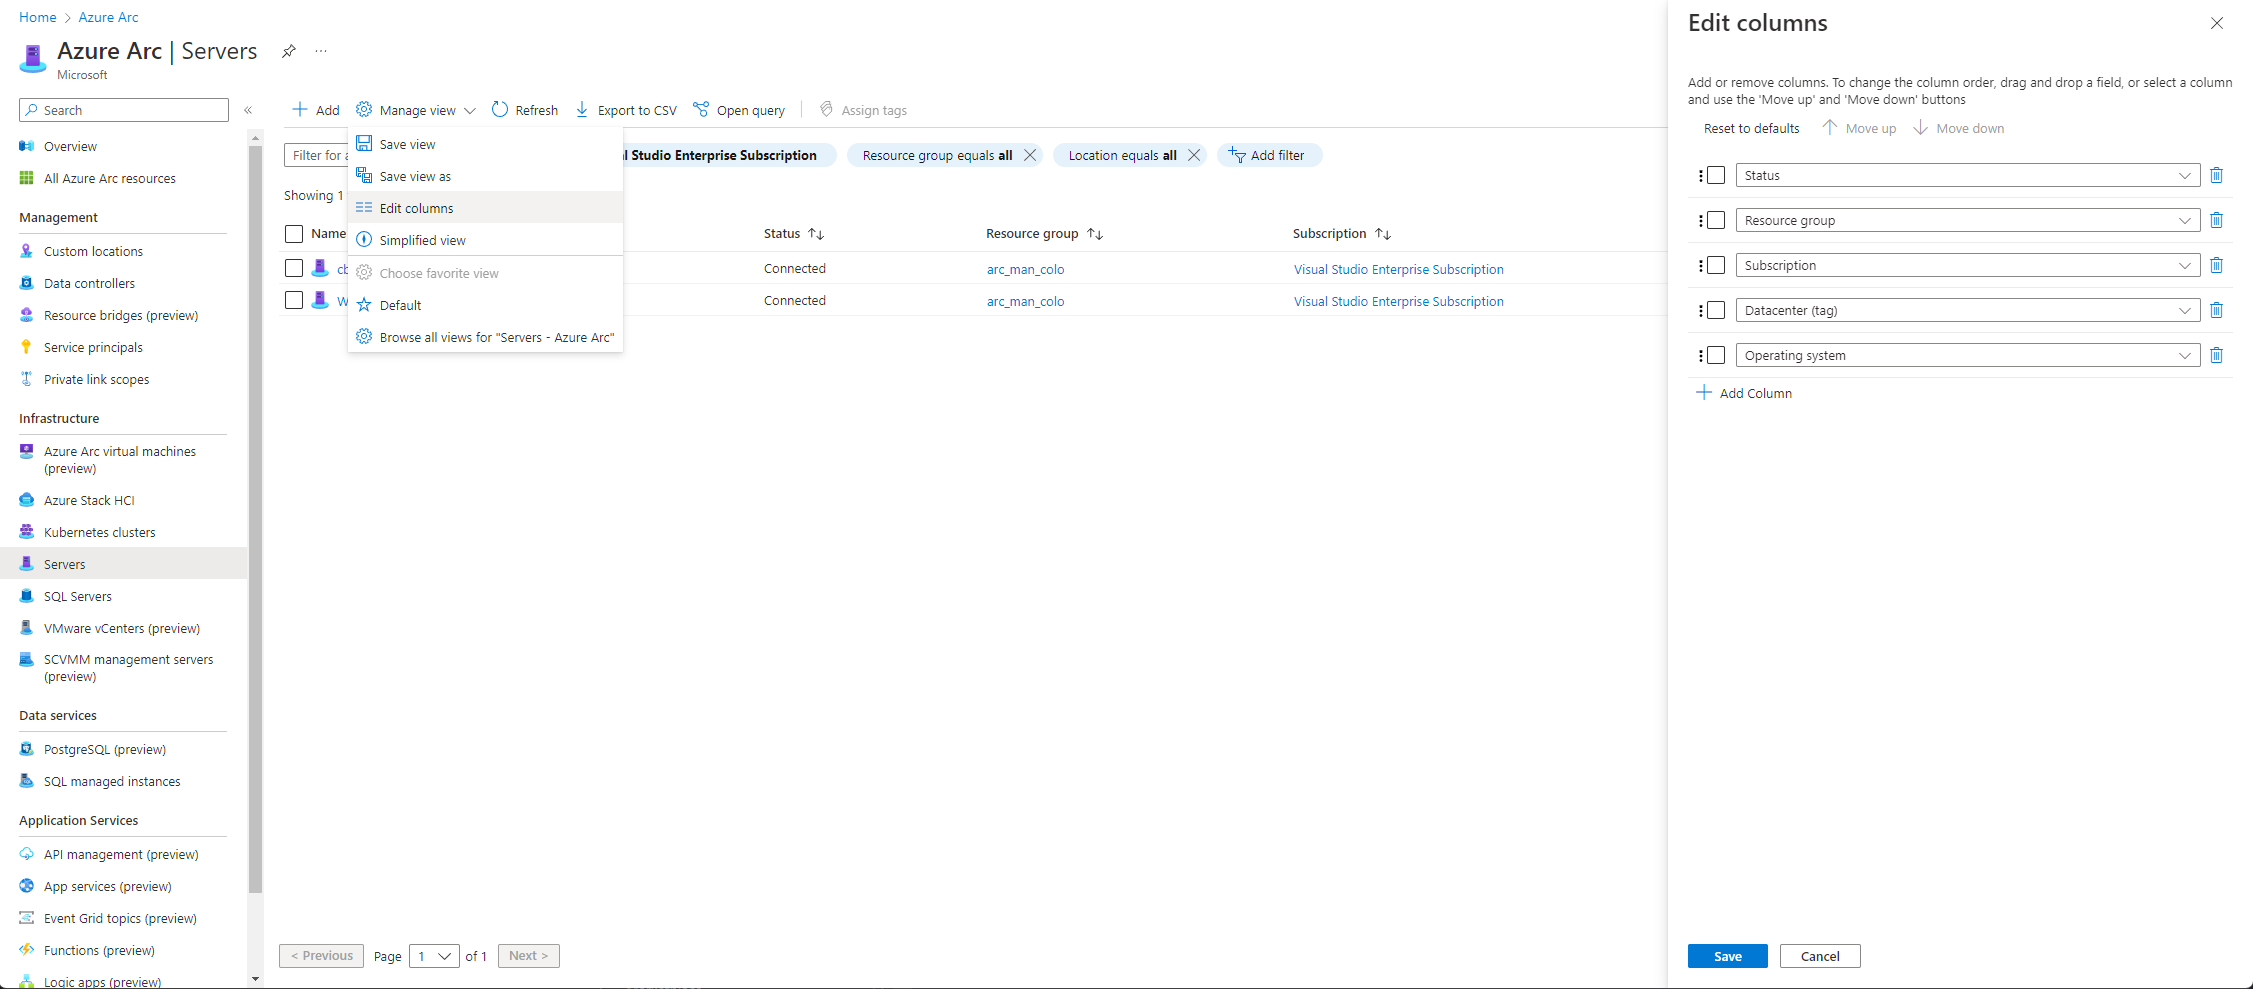
Columns can be built using available data on the platform already or based on tags assigned to resources.
All the tags we have configured have been added to the view and the filter is then built using the hypervisor = ‘all’ and Operating system = ‘Windows’.

We can use the Manage view menu option to save the view, it will prompt you for a name and to confirm saving the view. Once saved you can switch between the views or select your newly created view as the default view.
Azure Resource Graph Explorer
Following on from Views, another way we can access and front the information is via Azure Resource Graph Explorer (which for me was a recent discovery, recent but extremely useful). Microsoft describes Azure Resource Graph Explorer in the following way:
Azure Resource Graph is an Azure service designed to extend Azure Resource Management by providing efficient and performant resource exploration with the ability to query at scale across a given set of subscriptions so that you can effectively govern your environment.
Azure Resource Graph Explorer uses KQL as the query language of choice, this is the common query language of choice across the platform. KQL is similar to SQL, it uses schema entities that are organised in a hierarchy.
Searching and selecting the service will take you to the landing page, which quite simply lists the available categories and tables that are available to query.
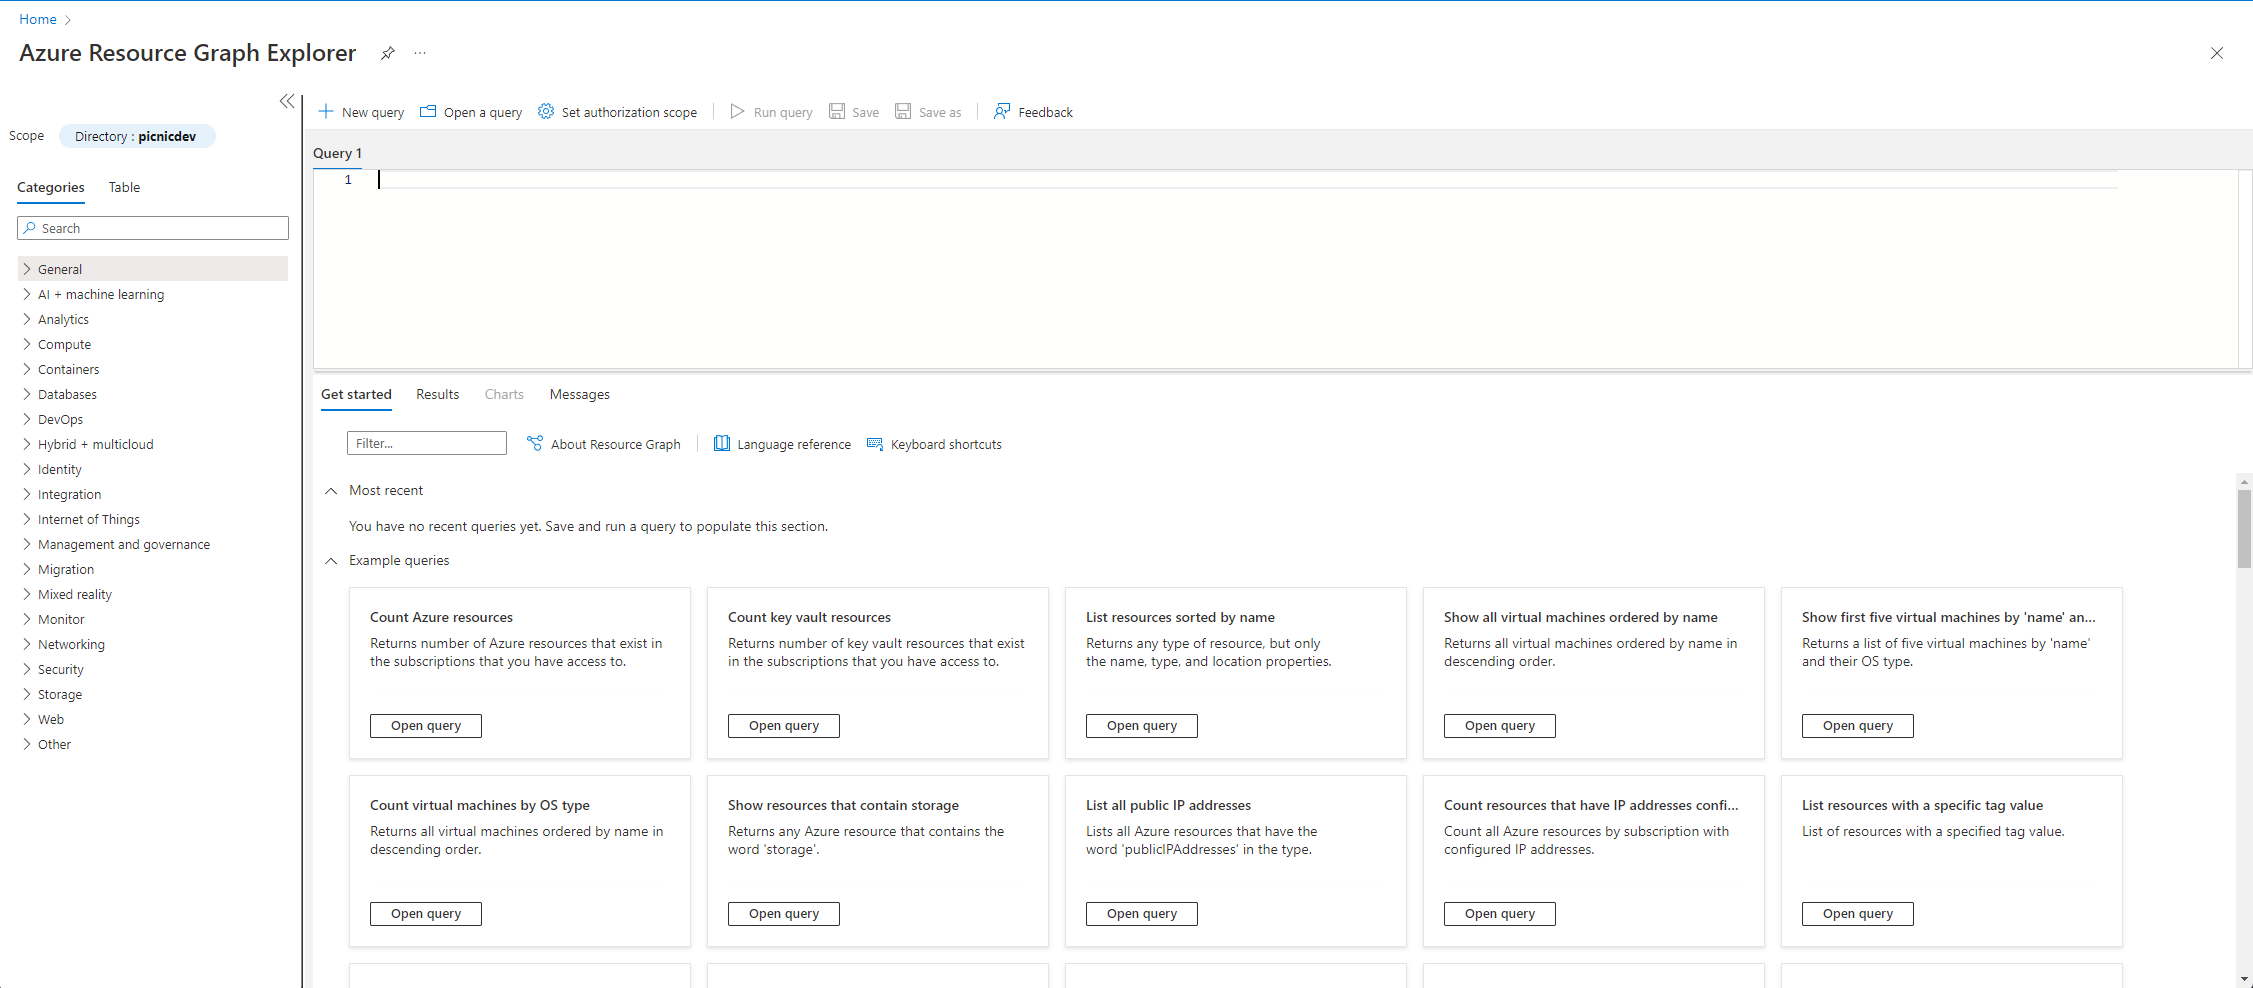
There will be a section that will display some default/boilerplate templates to query for data however, we will be building our queries. You could look for the table you want to use but I find that it is easier to use the categories to drill down to the data we want to query. All the information stored about our Arc-enabled servers will be stored under the Hybrid + multicloud category. Expanding the category will list a subset of available categories we can query and below that the relevant tables holding the data.
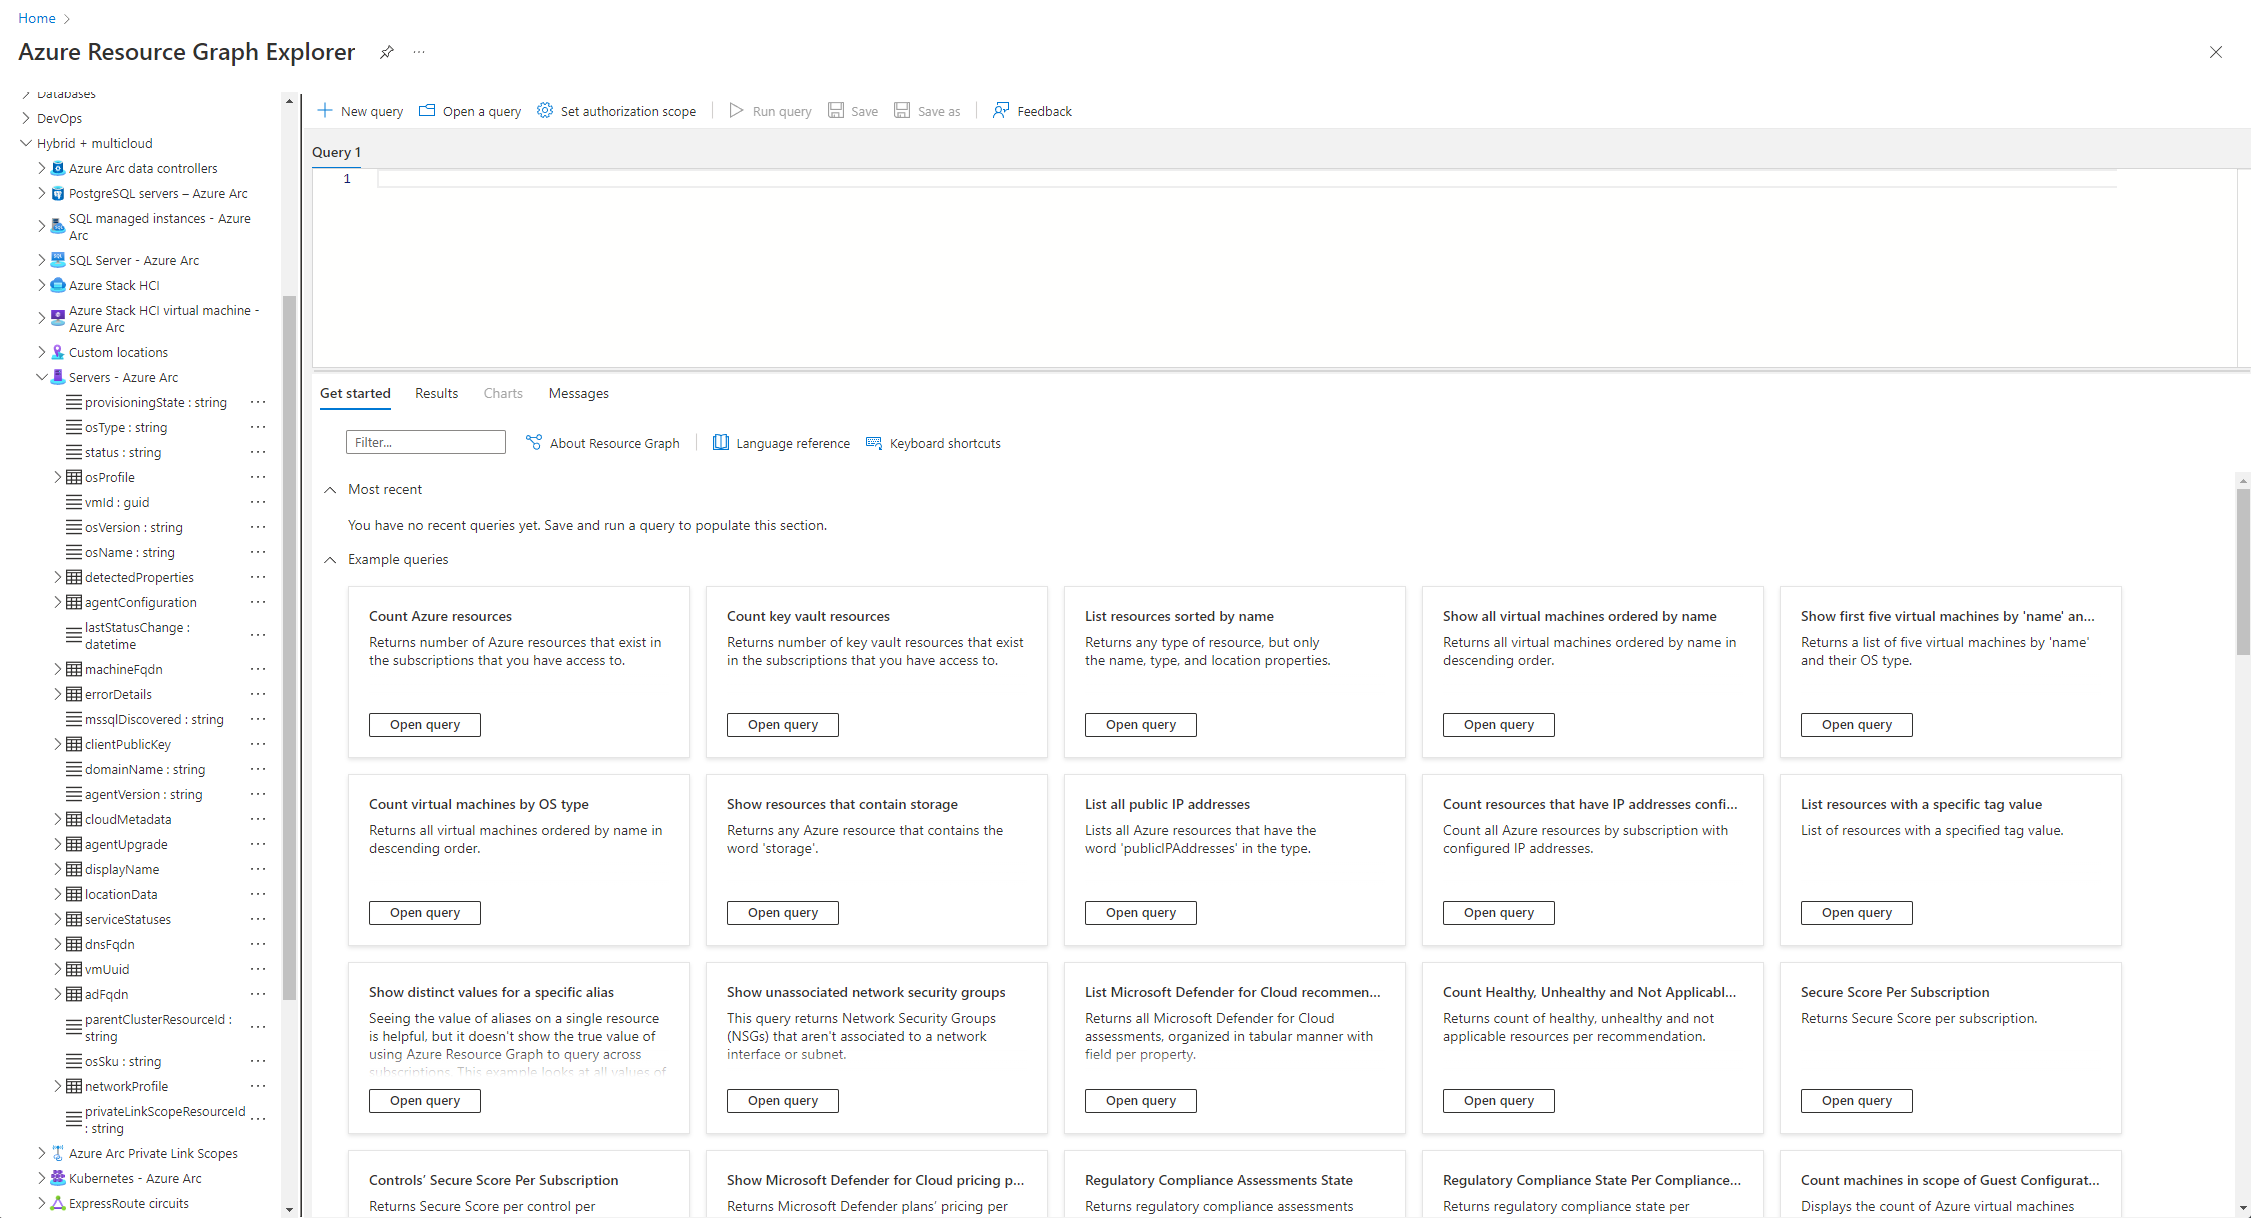
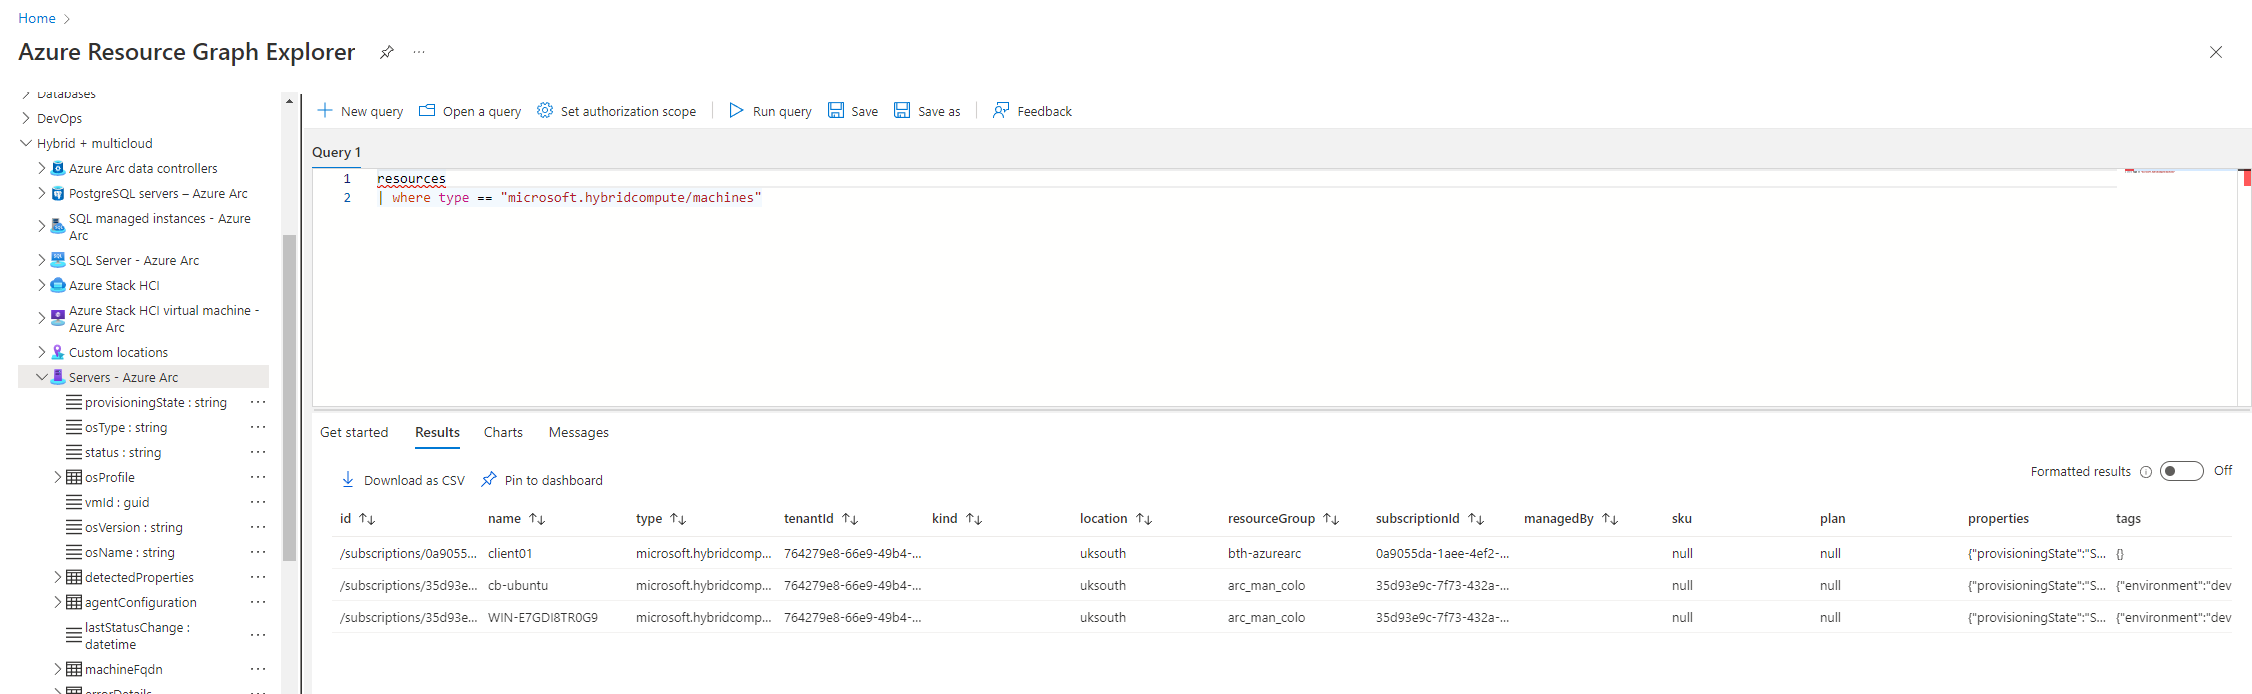
Single left click on Servers - Azure Arc will prepopulate part of the query for you.

You could run that query and it will list all the resources, across multiple subscriptions that meet those conditions. As you can see from the following screenshot another VM is returned from another subscription linked to the current one I am using.
As we do not need the resource from the other subscription, a filter will help remove it from our results. Using the existing query provided via the platform, we can see that it has provided us with the mechanism to filter our results down. To remove the resource from the other subscription we will select everything from the hybridcompute/machines and specify our subscription ID also. We can grab the subscription ID from the current results, fine/scroll along until you see a hyperlinked option See Details

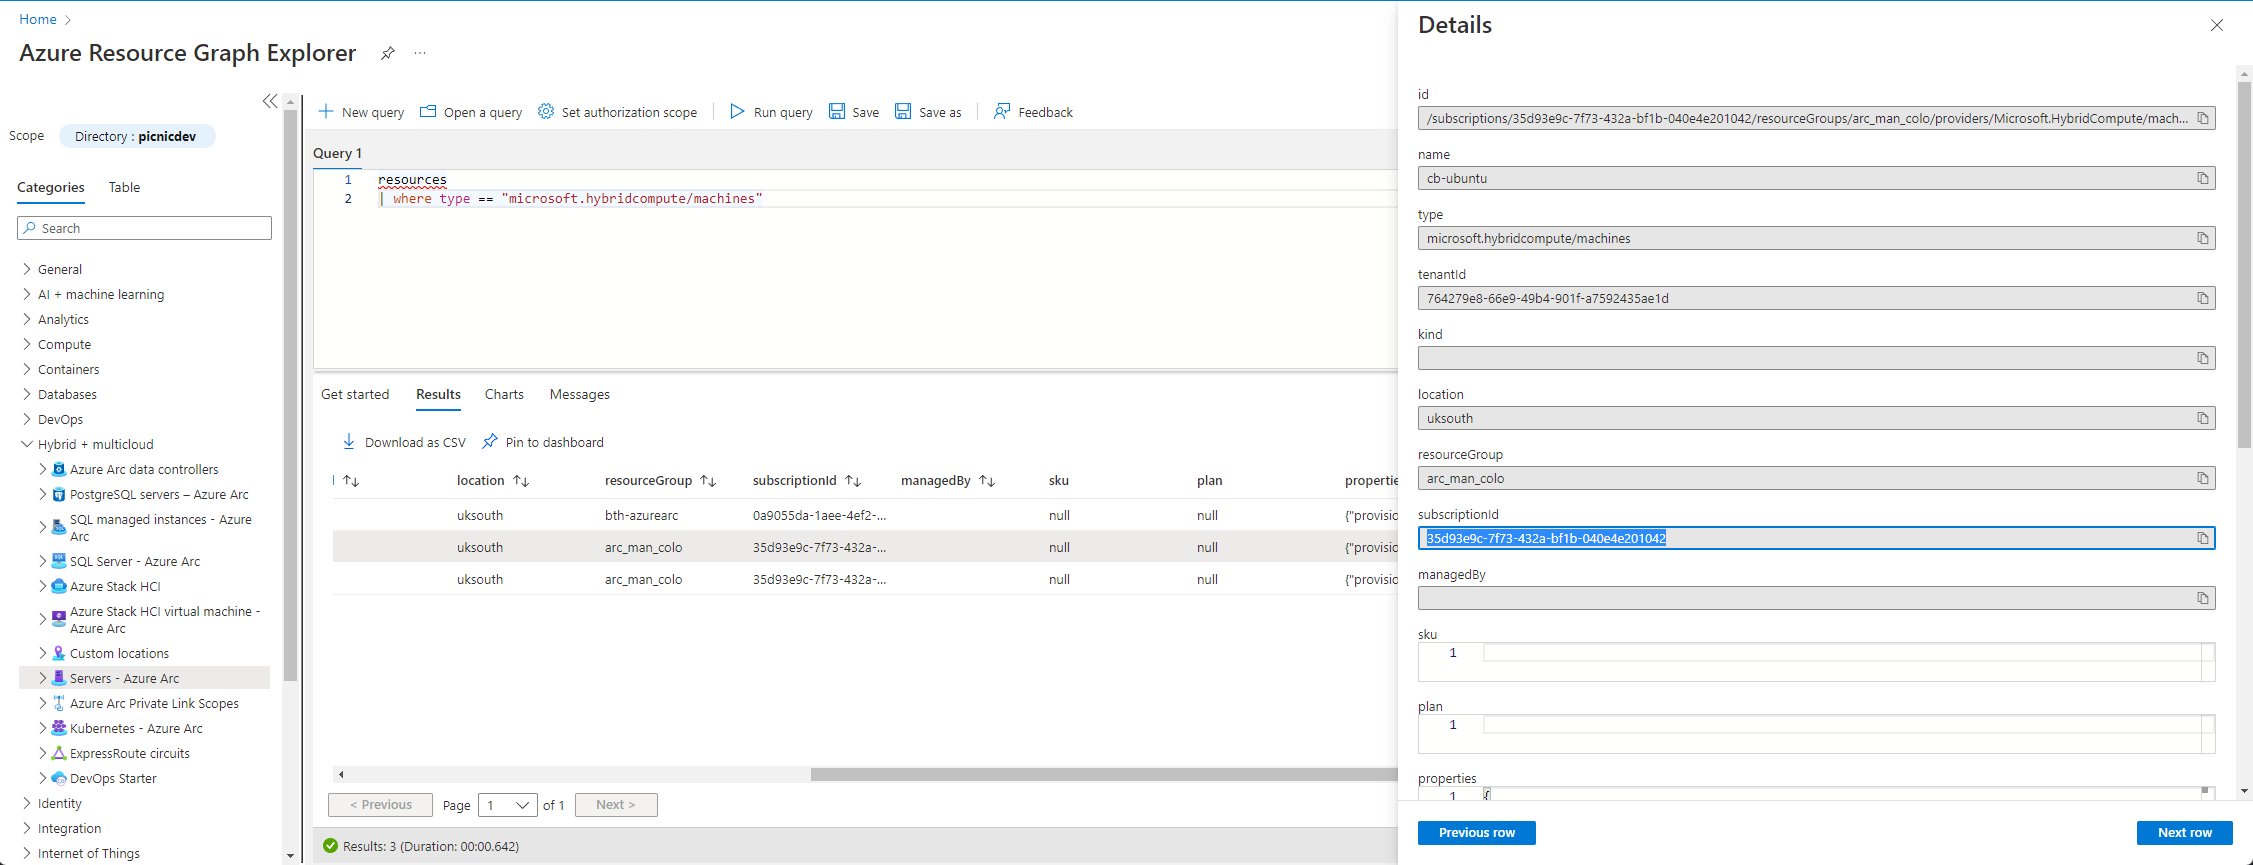
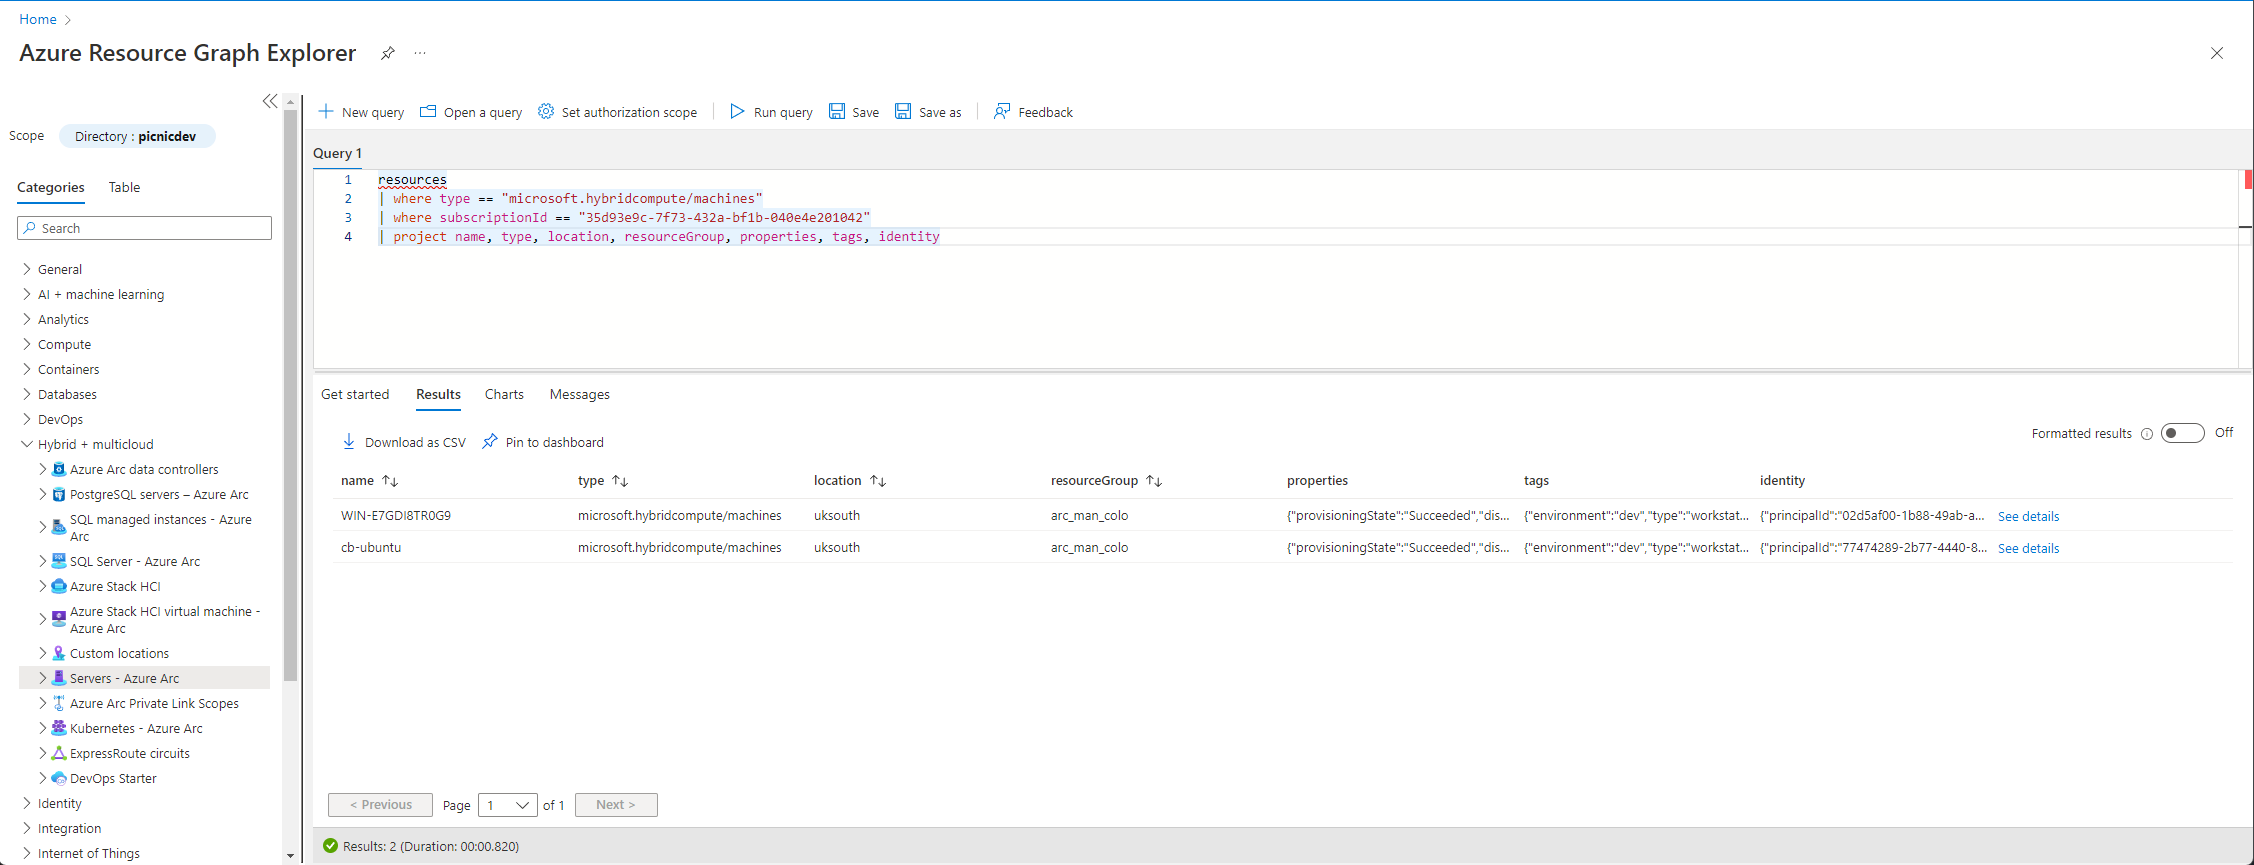
This page is useful when you need to know the column names to then filter by, so we know our subscription ID we can build on our existing query. To add a new filter to our query use ‘|’ or pipe/vertical bar then use the where function to specify subscriptionId (referenced in the image above) followed by the equals operator ‘==’ before specifying our value; being our subscription ID.
Something similar to the below should now exist:
resources
| where type == "microsoft.hybridcompute/machines"
| where subscriptionId == "35d93e9c-7f73-432a-bf1b-040e4e201042"
Running this, the results will drop the resource found prior leaving two resources that we want. For the blog post, a few columns have been dropped to make it easier to read (using the ‘project’ function).
As KQL is widely used across the platform you can see how quickly this information can be surfaced, especially useful when building a dashboard.
SSH
⚠️
The feature that will be outlined in this section is in Preview.
With this, the feature is bound to different terms and conditions which can be found here.
⚠️
As the title suggests; in this section the steps to enable SSH on Arc-enabled servers without the need for a public IP address. SSH functionality whether interactively or automated allows users a high degree of flexibility when using existing tooling or processes.
Supported Operating Systems
- Windows: Windows 7+
- Windows Server 2012+
- Linux:
- CentOS: CentOS 7, CentOS 8
- RedHat Enterprise Linux (RHEL): RHEL 7.4 to RHEL 7.10, RHEL 8.3+
- SUSE Linux Enterprise Server (SLES): SLES 12, SLES 15.1+
- Ubuntu Server: Ubuntu Server 16.04 to Ubuntu Server 20.04
Availability
eastus2euap, eastus, eastus2, westus2, southeastasia, westeurope, northeurope, westcentralus, southcentralus, uksouth, australiaeast, francecentral, japaneast, eastasia, koreacentral, westus3, westus, centralus, northcentralus.
Prerequisites
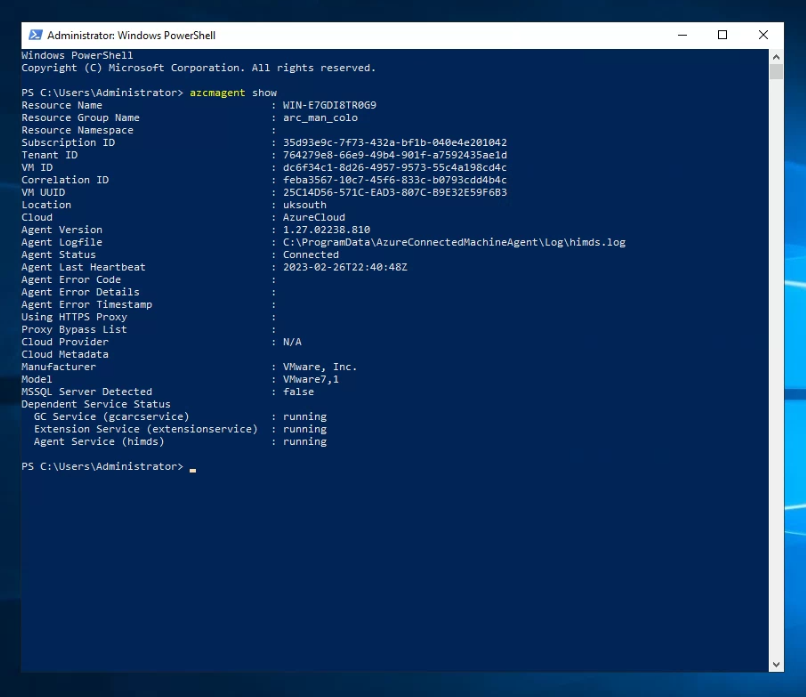
- Ensure the Arc-enabled server has a hybrid agent version of “1.13.21320.014” or higher.
- Run:
azcmagent showon your Arc-enabled Server. - Ensure the Arc-enabled server has the “sshd” service enabled.
- Ensure you have the Virtual Machine Local User Login role assigned
Windows
Prerequisites
A check confirmed that the prerequisites are met before proceeding.
Via Apps & Features

Via PowerShell
sshd service installed & enabled
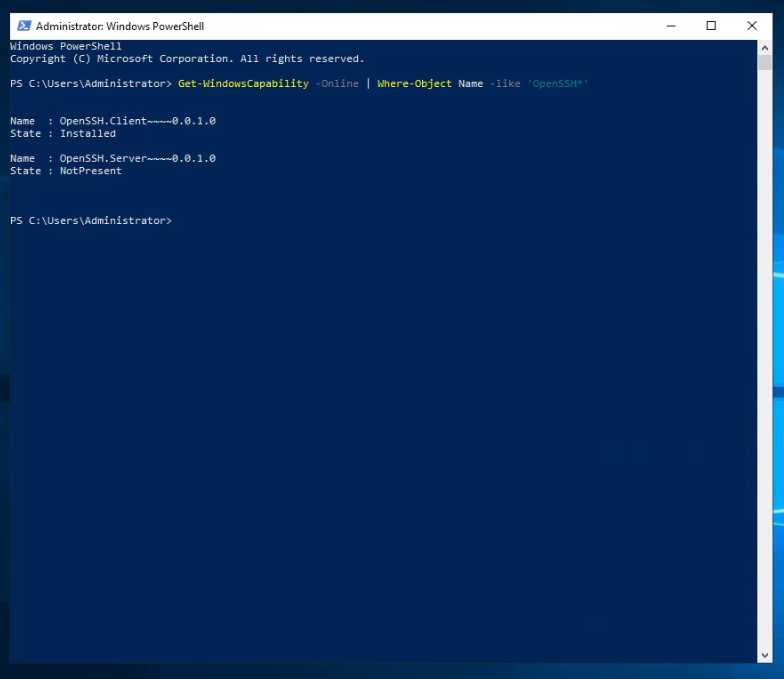
Currently, this server is missing the OpenSSH.Server~~~~0.0.1.0, the following steps will install the OpenSSH.Server element so we can proceed. Using the following PowerShell command it will install OpenSSH Server.
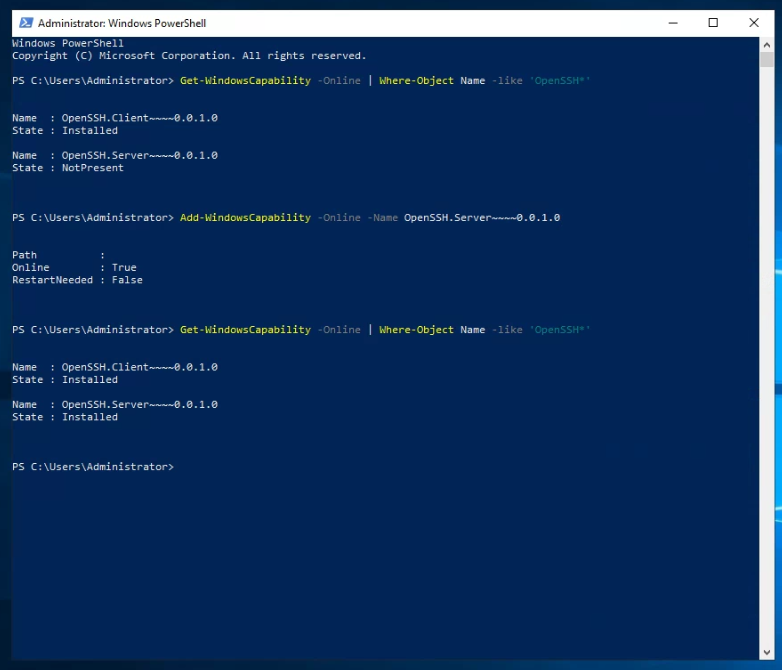
Add-WindowsCapability -Online -Name OpenSSH.Server~~~~0.0.1.0
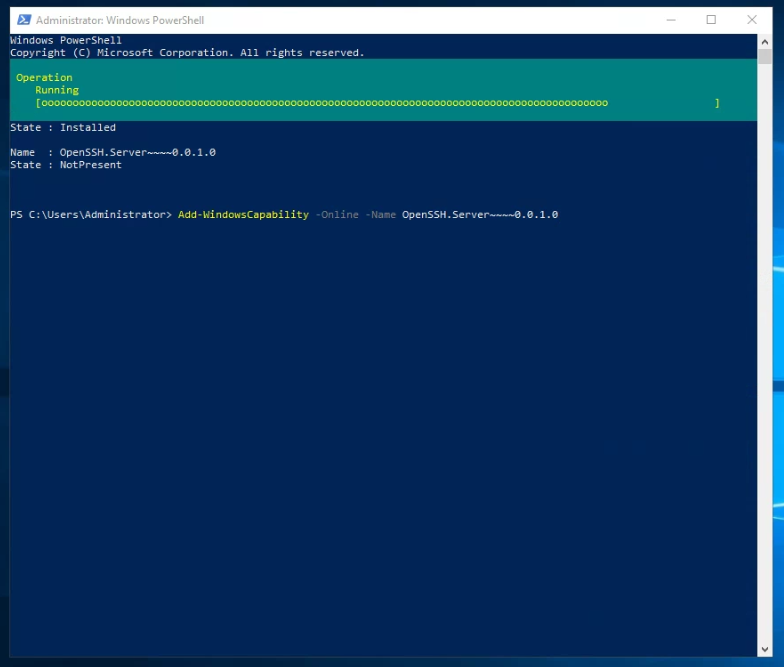
Once complete, re-run the command to check the installation, it will display something similar to the one below. If the install fails troubleshoot and attempt again.
Set the services to run and Automatic startup type.
# Start the OpenSSH service
Start-Service sshd

# Set the OpenSSH service to 'Automatic' startup
Set-Service -Name sshd -StartupType 'Automatic'
The final check is to ensure there are rules created in the local firewall for port 22 inbound or the custom port you set later on in this post.
# Check the firewall has a configured rule
if (!(Get-NetFirewallRule -Name "OpenSSH-Server-In-TCP" -ErrorAction SilentlyContinue | Select-Object Name, Enabled)) { Write-Output "Firewall Rule 'OpenSSH-Server-In-TCP' does not exist, creating it..." New-NetFirewallRule -Name 'OpenSSH-Server-In-TCP' -DisplayName 'OpenSSH Server (sshd)' -Enabled True -Direction Inbound -Protocol TCP -Action Allow -LocalPort 22 } else { Write-Output "Firewall rule 'OpenSSH-Server-In-TCP' has been created and exists." }
Configuration
To enable SSH on your Arc-enabled server you will need the following:
- Install the AzPreview PowerShell module
- Used to create the default connectivity endpoint
- Configure Azure Connected Machine Agent
- Use either the default (Port 22) or supply a custom port for SSH
- Optional: Register HybridConnectivity resource provider
- Create default connectivity endpoint
- Assign RBAC roles
Install the AzPreview module using the following command.
# Option 1: Install with no scope
Install-Module -Name AzPreview -Repository PSGallery -Force

# Option 2: Install for Current User
Install-Module -Name AzPreview -Scope CurrentUser -Repository PSGallery -Force
This will then proceed to download and install the required components.

Once completed, proceed with checking and editing the current azcmagent configuration. This can be completed in PowerShell.
# To view the current configuration of the azcmagent
azcmagent config list

# To set incoming connection ports of the azcmagent
azcmagent config set incomingconnections.ports 22
Here you can change the standard port to a custom port if required
You may need to register HybridConnectivity resource provider, to check if the resource provider has been registered you can use the Azure CLI in the portal.
az provider show -n Microsoft.HybridConnectivity
If it needs to be registered, using the following command will register the provider. This operation can take up to approx 5 minutes to complete.`
az providor register -n Microsoft.HybridConnectivity
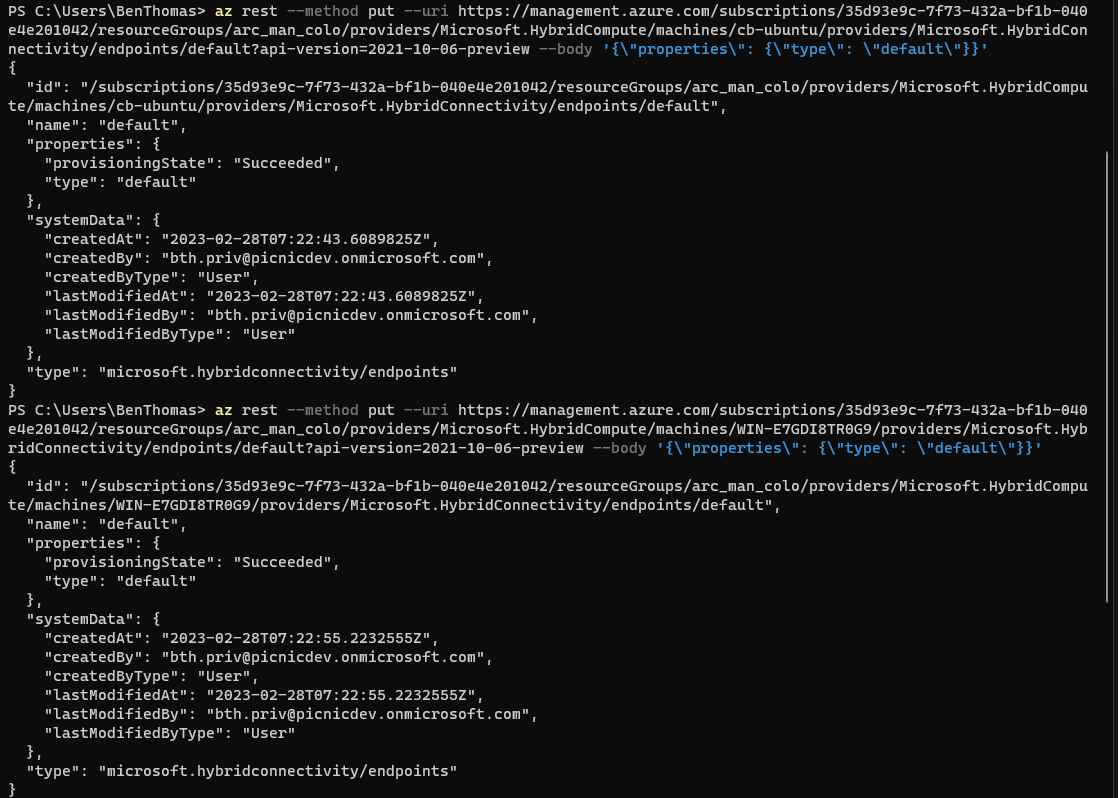
This following command then needs to be run for each Arc-enabled server.
az rest --method put --uri https://management.azure.com/subscriptions/<subscription>/resourceGroups/<resourcegroup>/providers/Microsoft.HybridCompute/machines/<arc enabled server name>/providers/Microsoft.HybridConnectivity/endpoints/default?api-version=2021-10-06-preview --body '{\"properties\": {\"type\": \"default\"}}'
Replacing the '<subscription>', '<resourcegroup>' and '<arc enabled server name>' sections of the uri. In this example the uri formed would be this:
# Arc-enabled Ubuntu
az rest --method put --uri https://management.azure.com/subscriptions/35d93e9c-7f73-432a-bf1b-040e4e201042/resourceGroups/arc_man_colo/providers/Microsoft.HybridCompute/machines/cb-ubuntu/providers/Microsoft.HybridConnectivity/endpoints/default?api-version=2021-10-06-preview --body '{\"properties\": {\"type\": \"default\"}}'

# Arc-enabled Windows 2019
az rest --method put --uri https://management.azure.com/subscriptions/35d93e9c-7f73-432a-bf1b-040e4e201042/resourceGroups/arc_man_colo/providers/Microsoft.HybridCompute/machines/WIN-E7GDI8TR0G9/providers/Microsoft.HybridConnectivity/endpoints/default?api-version=2021-10-06-preview --body '{\"properties\": {\"type\": \"default\"}}'
Upon executing you will be able to see the provisioningState key returned with a value in the output, ‘Succeeded’ means the server endpoint has been created and anything else will require troubleshooting.
To SSH into an Arc-enabled server, use az ssh which is an extension for the Azure CLI (min ver 2.4.0 or higher). The extension will automatically install the first time if you do not have it installed already. Using a local account on the Arc-enabled server, an SSH session can be opened using the following syntax.
az ssh arc --local-user username --resource-group myResourceGroup --name myMachine

You will be prompted for a password for the specified account, no characters will be displayed this is expected behaviour.

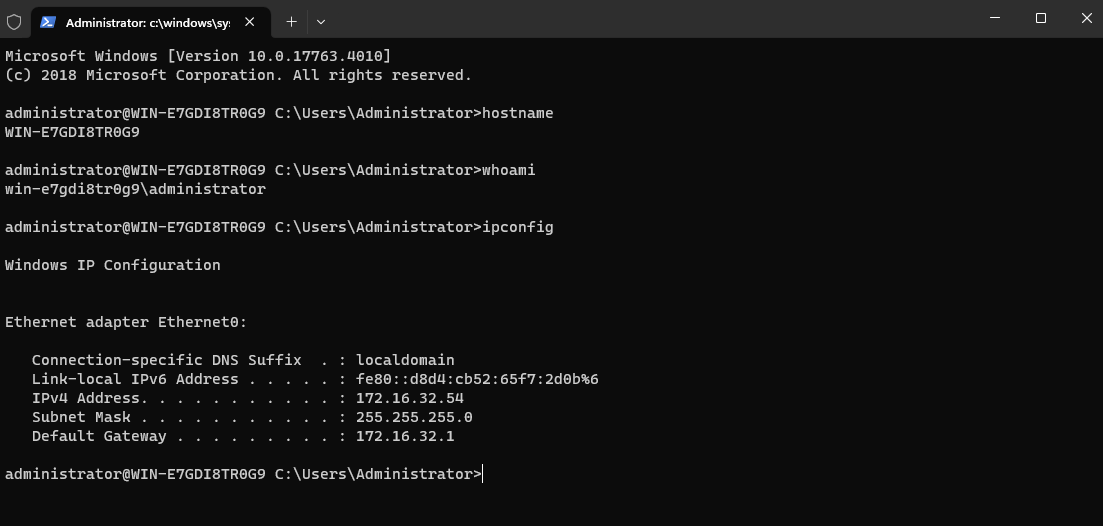
With only logging into Azure via the CLI and no additional connectivity setup, the screen presented now (if all the conditions have been satisfied) will now have a remote console.
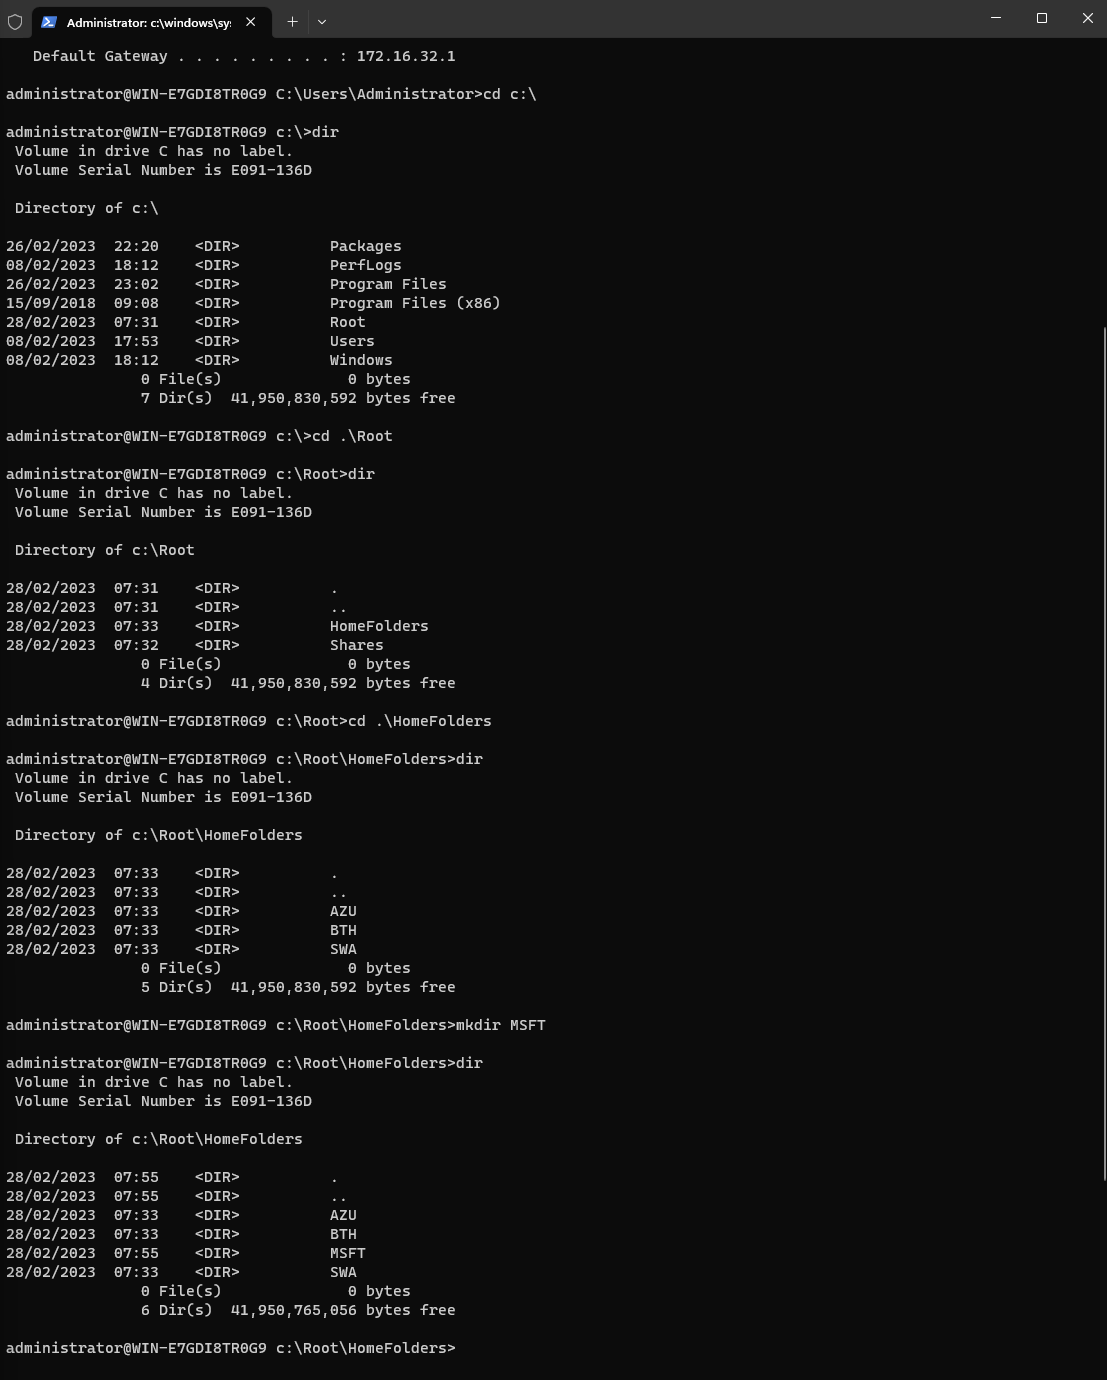
From here we can browse directories and create new folders.
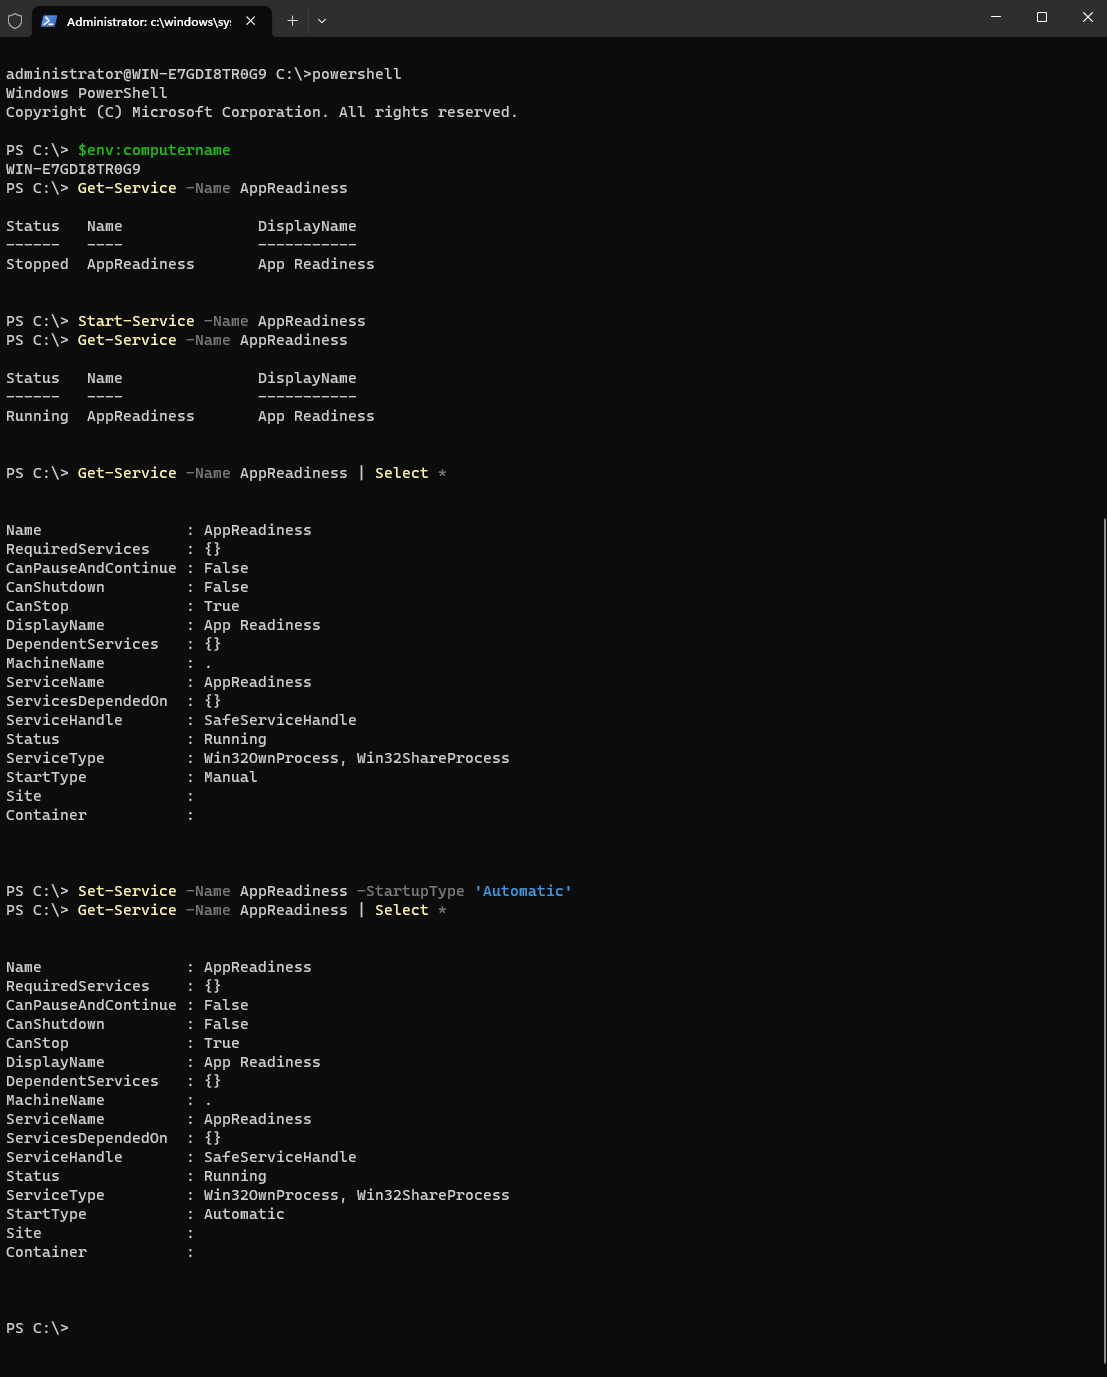
To change from command prompt to PowerShell, type powershell.
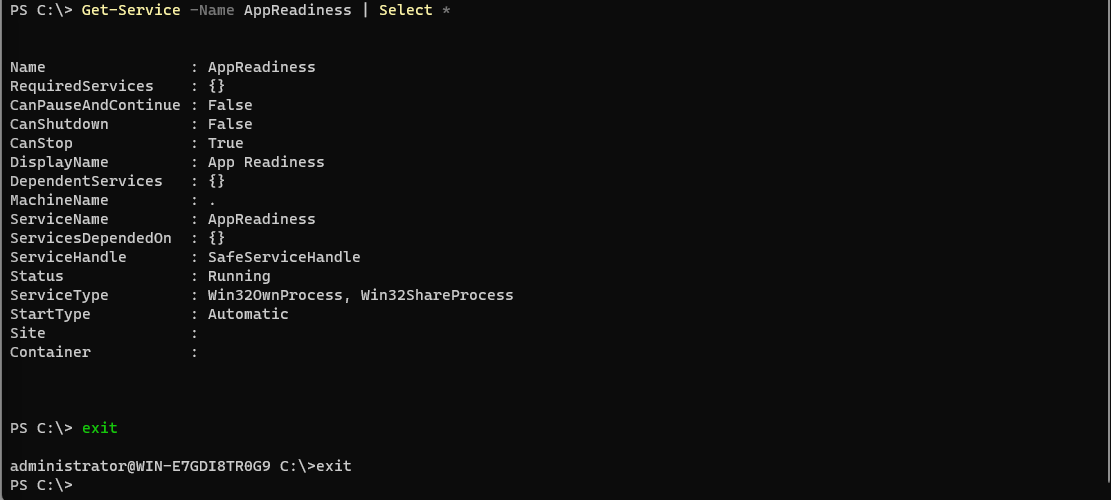
To close the SSH session type exit, you may need to complete this twice if you have opened PowerShell or another command line function.
Updating Agents
As with most agent-based technologies, updates are pushed to add additional features, patch bugs, and vulnerabilities. Updating the agents on your endpoints can be completed manually, via Windows Update, SCCM and other 3rd party products. The following section will show you how to update and upgrade a Linux agent and a Windows agent via Windows Update.
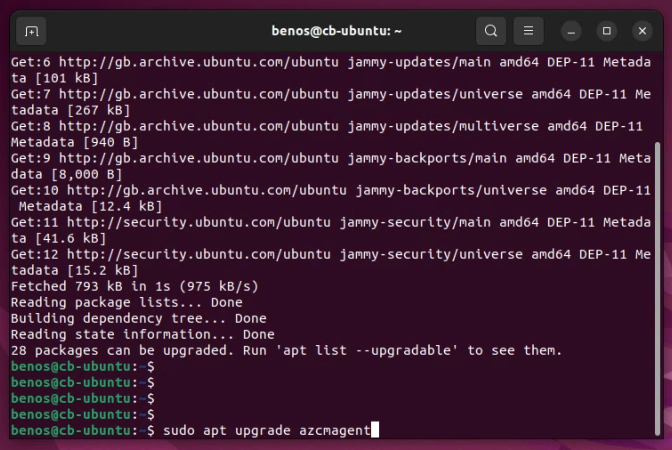
Linux
Open a shell window and update the package cache.
sudo apt update
Once completed to explicitly update the Azure Connected Machine Agent (if there is an update available), run the following in the shell window.
sudo apt upgrade azcmagent
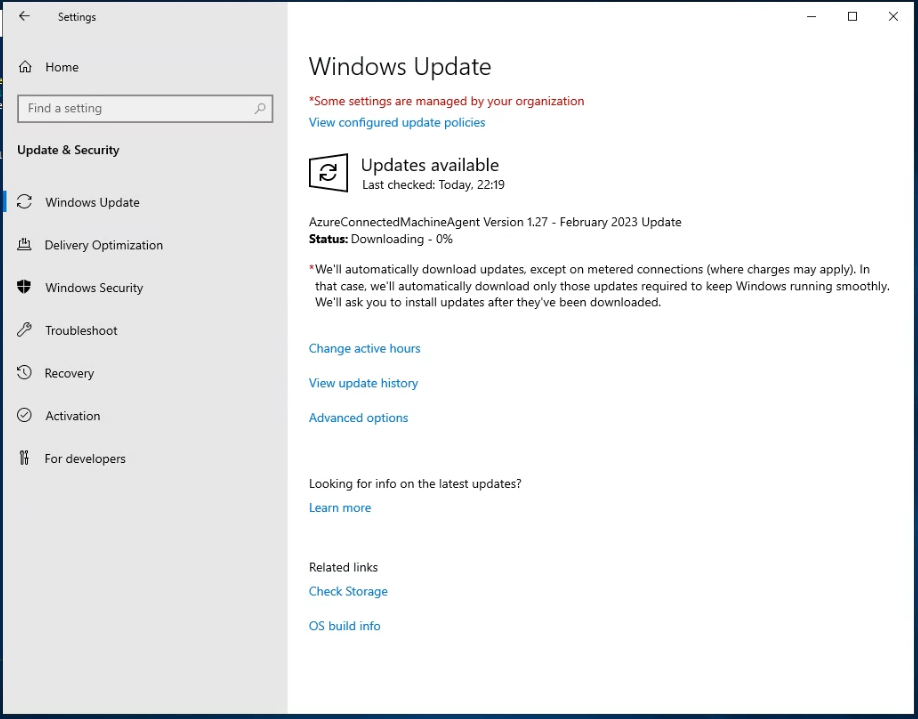
Windows
Open PowerShell, this will be used to configure Windows Update to check for other Microsoft products. The following code will configure this setting for you.
$ServiceManager = (New-Object -com "Microsoft.Update.ServiceManager")
$ServiceID = "7971f918-a847-4430-9279-4a52d1efe18d"
$ServiceManager.AddService2($ServiceId,7,"")
Once completed, a force check with Windows Update will pull any available updates for the agent down to install.
For other ways agent updates for Windows can be completed, more information can be found here.
Windows Admin Center
Windows Admin Center or Project Honolulu as it was first called has been around since 2017. Over time it has had more features added to it and become more prevalent within the operating system. Whilst previously to Azure Arc you could use Windows Admin Center without Azure, using it without having to configure gateways or install anything on your server (other than the Azure Connected Machine agent) just got a little more convenient. If you haven’t used Windows Admin Center, I would recommend looking at using it as reducing the management overhead of servers on-premise and in the cloud only means time back to you as an admin.
⚠️
The feature that will be outlined in this section is in Preview.
With this, the feature is bound to different terms and conditions which can be found here.
⚠️
Availability
eastus, eastus2, westus2, southeastasia, westeurope, northeurope, westcentralus, southcentralus, uksouth, australiaeast, francecentral, japaneast, eastasia, koreacentral, westus3, westus, centralus, northcentralus, ukwest, canadacentral
Hybrid machine requirements
- Windows Server 2016 or later
- 3 GB of RAM or more
- Azure Arc agent version 1.13.21320.014 or later
Network requirements
Whilst there are no requirements for inbound ports to be open the hybrid machine must meet the following networking requirements:
- Outbound internet access or an outbound port rule allowing HTTPS traffic to the following endpoints:
*.wac.azure.comor theWindowsAdminCenterservice tag (for extension versions less than 0.0.0.203)*.waconazure.comor theWindowsAdminCenterservice tag (for extension versions greater than or equal to 0.0.0.203)pas.windows.net*.servicebus.windows.net
The management machine where the Azure Portal is running must meet the following networking requirements:
- Outbound internet access over port
6443
RBAC
Install Windows Admin Center extension
To install the Windows Admin Center extension for the Arc-enabled server one of the following roles must be assigned.
- Owner
- Contributor
- Windows Admin Center Administrator Login
Connect to Windows Admin Center
Connecting to Windows Admin Center requires both of the following roles assigned.
- Reader
- Windows Admin Center Administrator Login
: warning :
- The Windows Admin Center Administrator Login role uses dataActions and thus cannot be assigned to the management group scope. Currently, these roles can only be assigned to the subscription, resource group or resource scope.
-
warning :
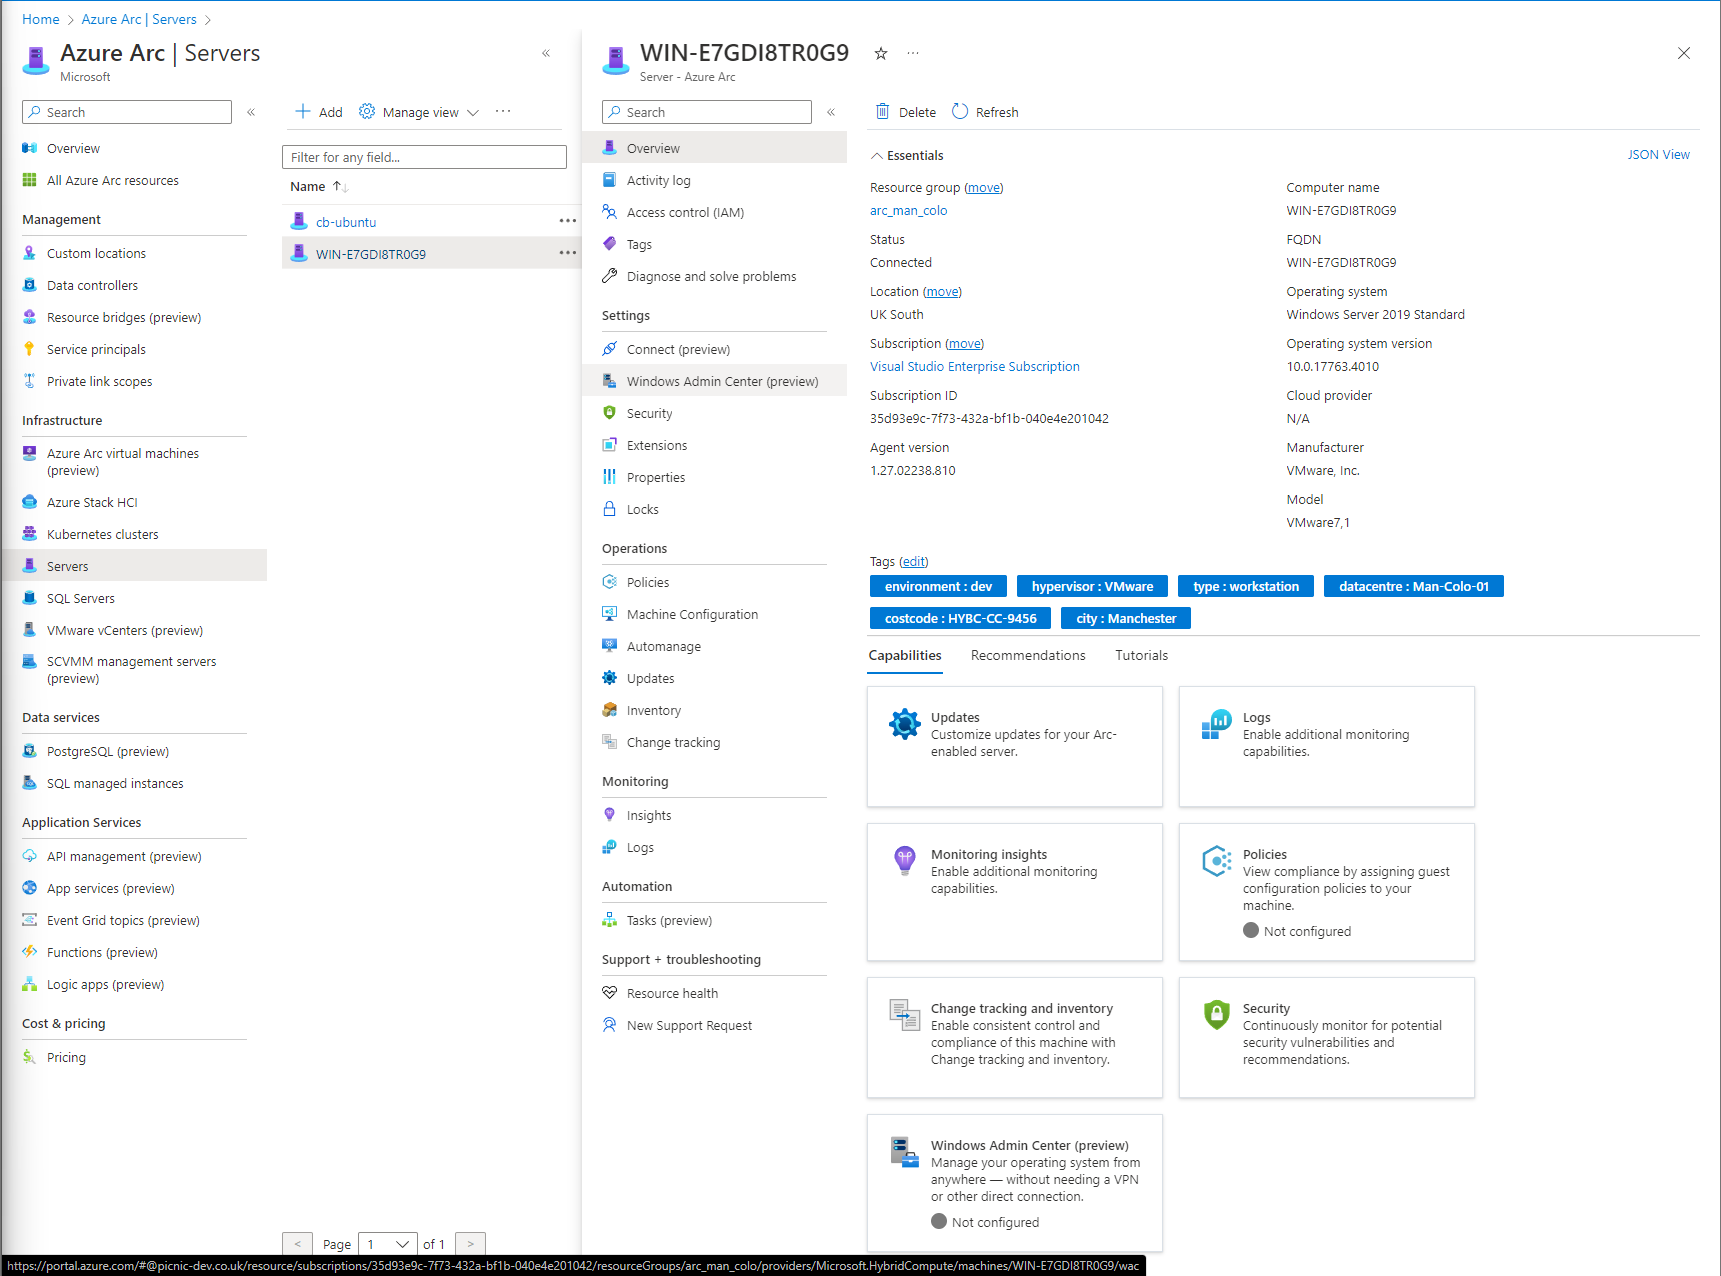
Install Windows Admin Center via the Azure Portal
To deploy the extension, navigate to Azure Arc and then Servers. Select the required Arc-enabled server and under the Settings group, select Windows Admin Center.
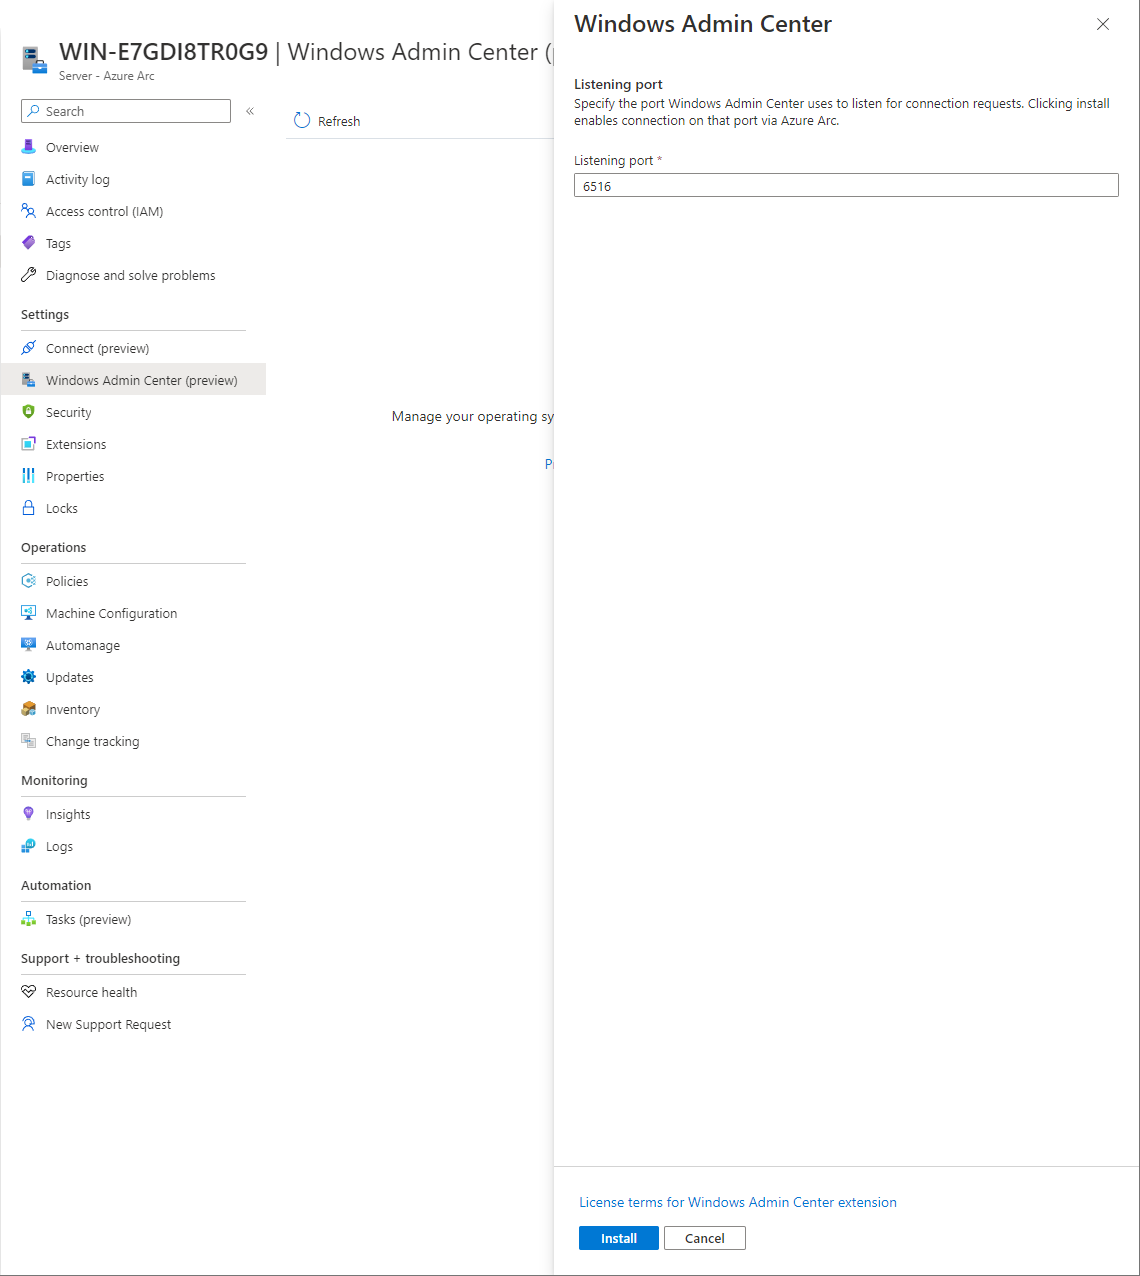
Select Setup, and a pane will open and ask you for a listening port for connection requests; once decided select Install.
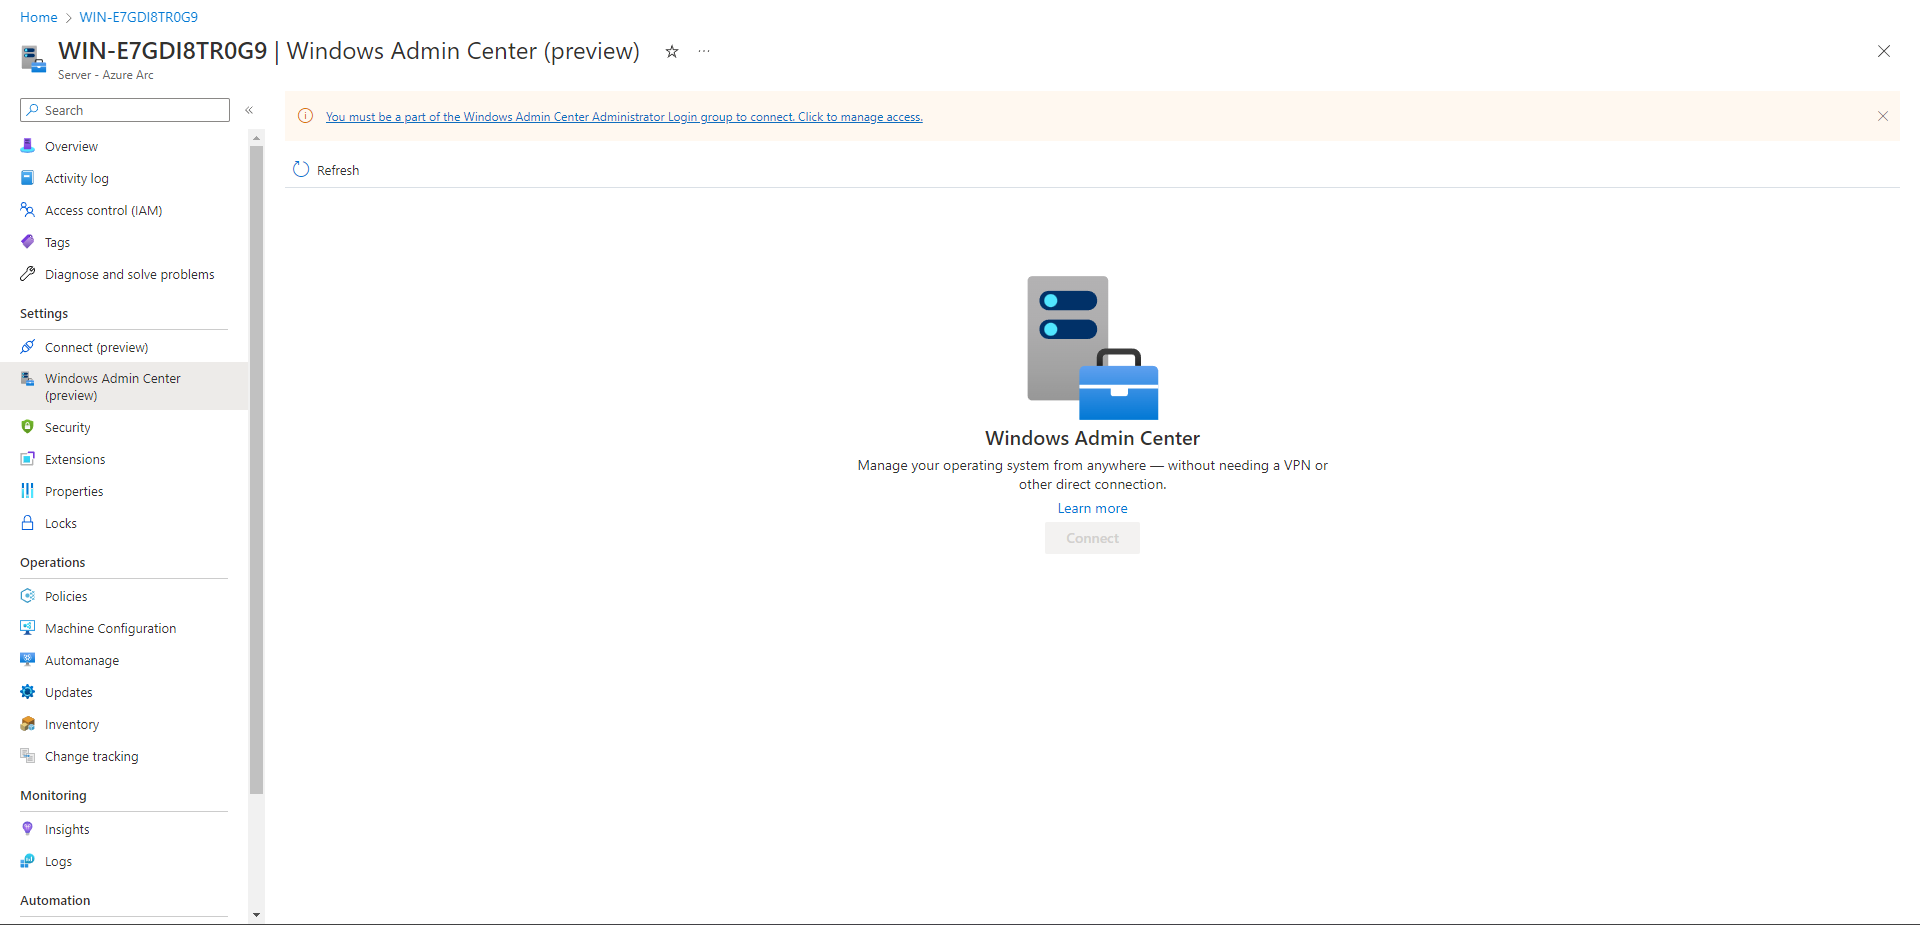
Regardless if you are Owner or a Contributor at any scope you will not be able to connect unless you have Windows Admin Center Administrator Login. This is good to know as when controlling access to Arc-enabled servers you can control access granularly/principle least privilege.
Permissions updated. gold bar advising about permissions has now been removed.
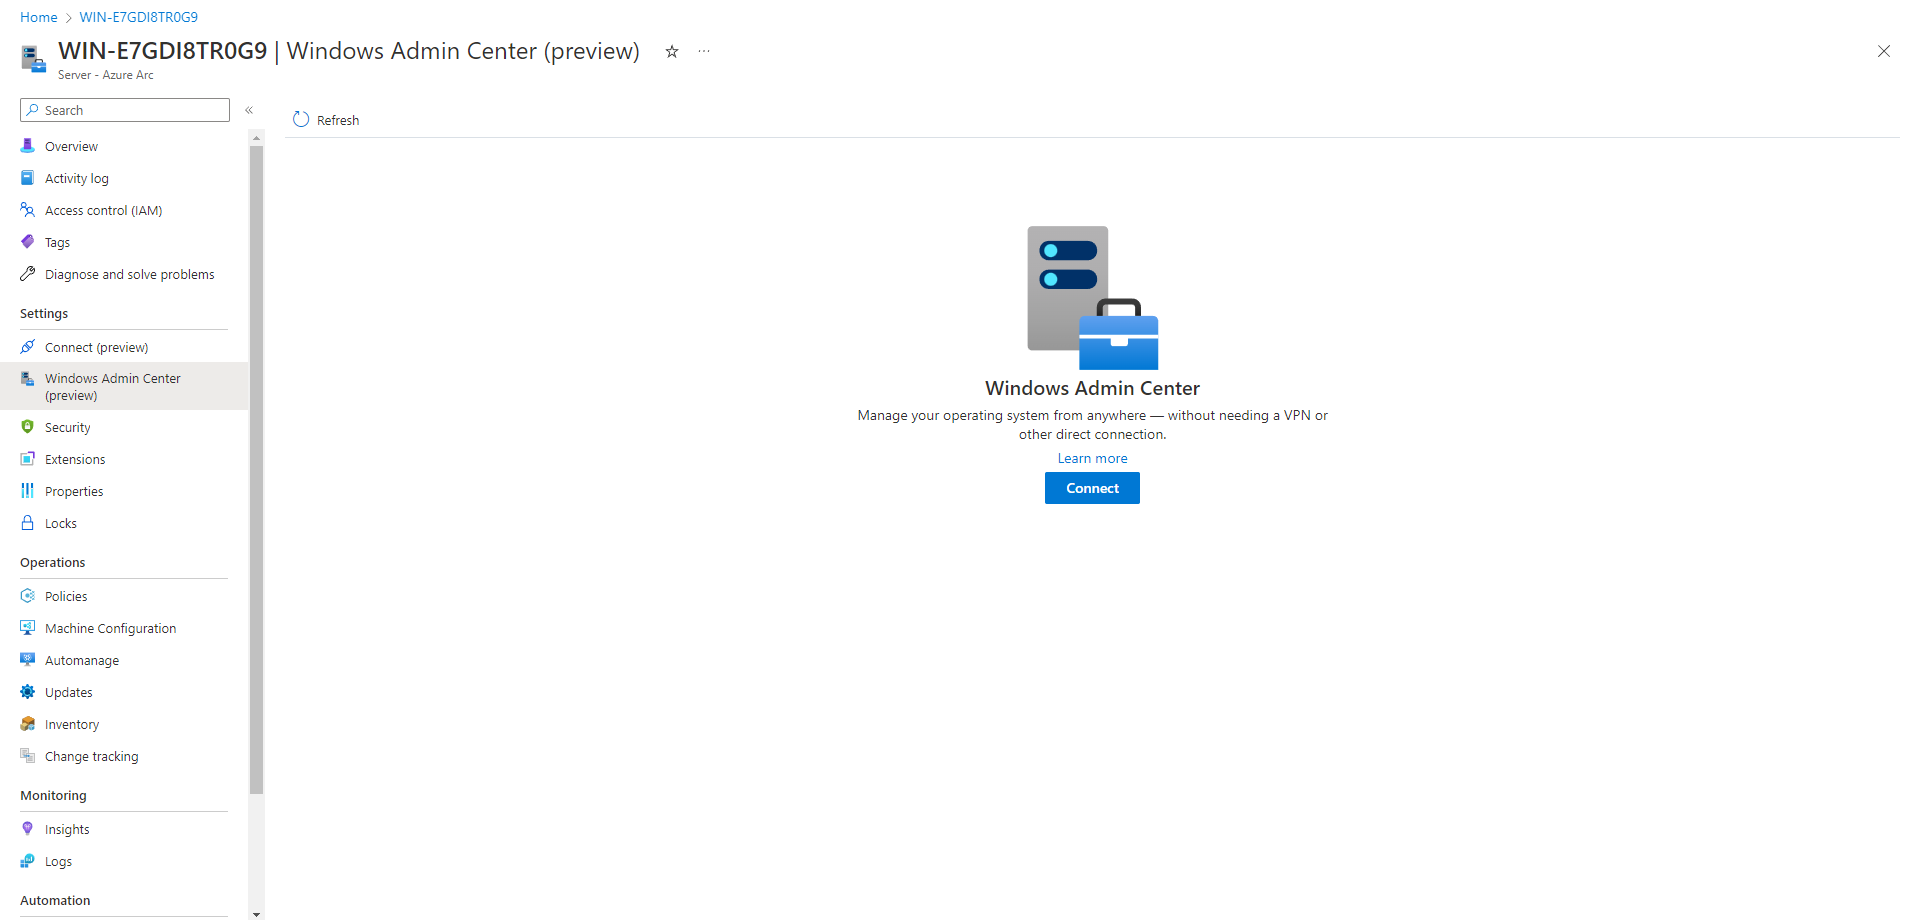
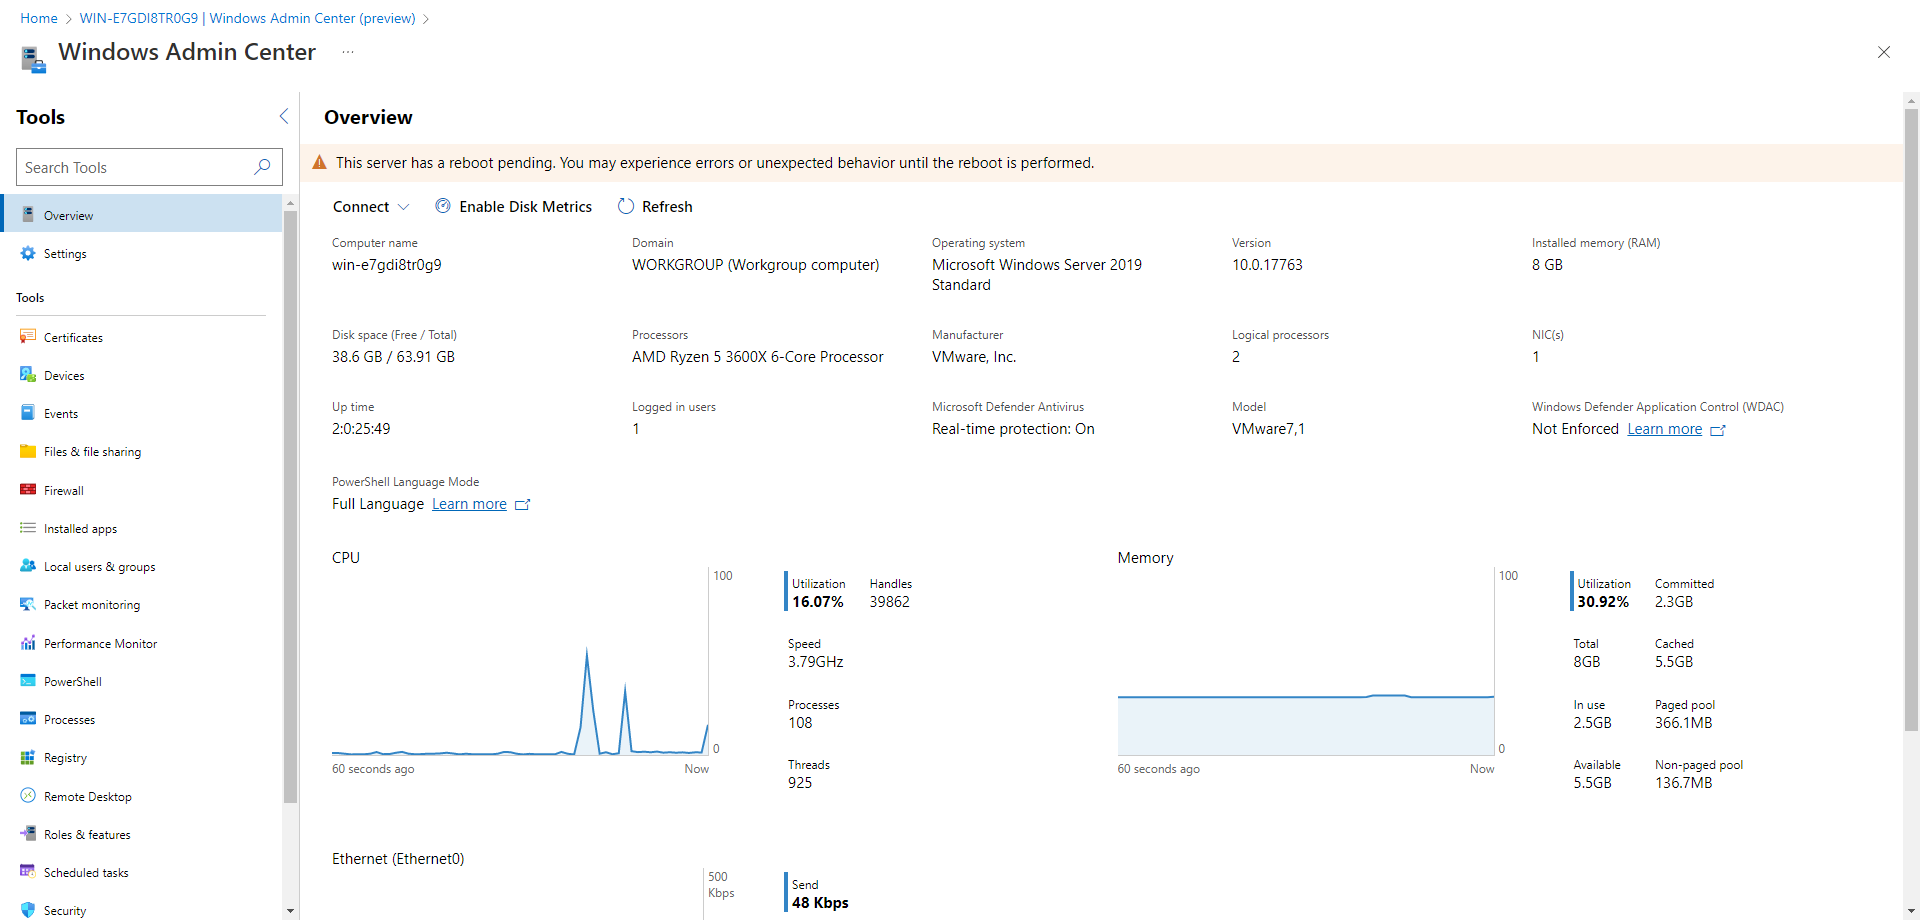
Select Connect, it will start the Windows Admin Center.
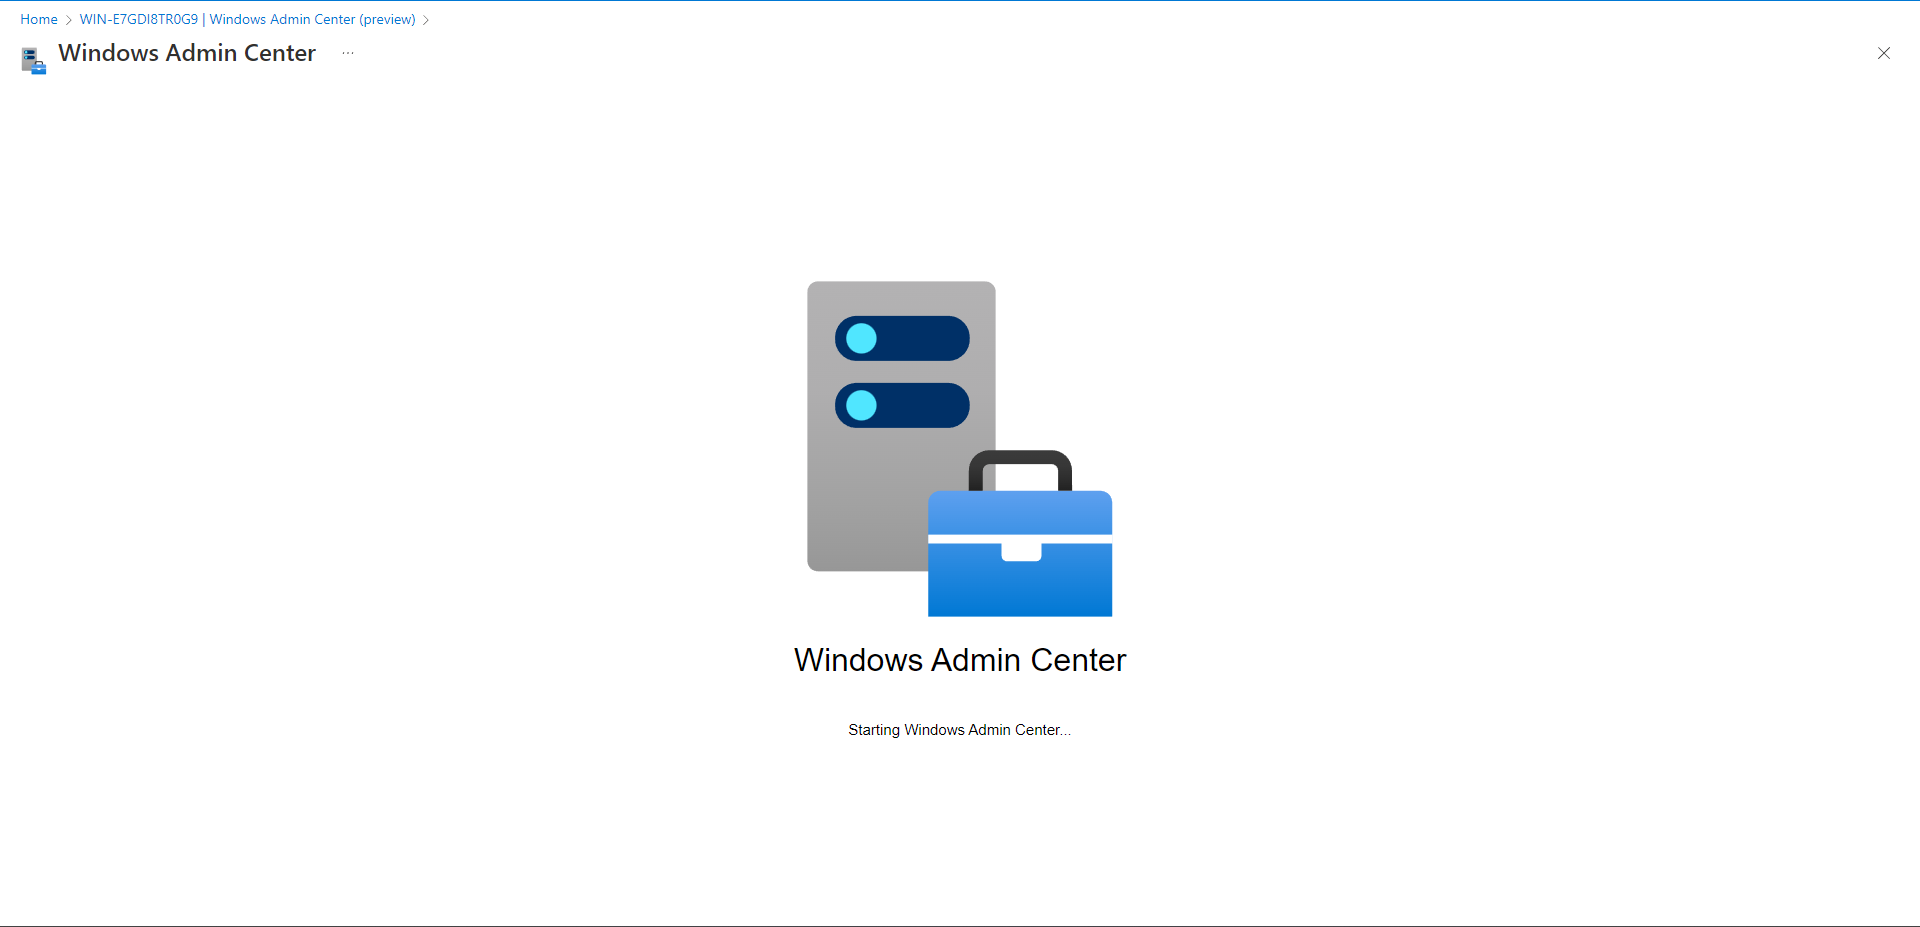
Once it loads, several tools are available to access remotely:
- Certificates
- Devices
- Events
- Files and file sharing
- Firewall
- Installed apps
- Local users and groups
- Packet monitoring
- Performance Monitor
- PowerShell
- Processes
- Registry
- Remote Desktop
- Roles and Features
- Scheduled tasks
- Security
- Services
- Storage
- Updates
- Virtual machines [^1]
- Virtual switches [^1] [^1] Some tools are dependent on installed Roles & Features
Summary
We have covered Tagging, Role Based Access Control, Inventory, Azure Resource Graph Explorer, SSH, Updating Agents and Windows Admin Center. It has taken a while to get this post out but some sections I wanted to ensure some were to a high level of detail and to put in the foundations for future posts. The objective for future posts is to highlight why use some of the features we’ve enabled/yet to enable, and how can we translate this to help an MSP complete onboarding activities and some additional items. I have included some reference links below to expand on some of the content outlined above.
References
What is Azure Arc-enabled servers?
Connected Machine agent prerequisites
Azure Connected Machine agent deployment options
SSH access to Azure Arc-enabled servers
Getting started with OpenSSH for Windows